REMOTE ACCESS
SSH

SSH (Secure Shell) is a network protocol that securely connects two computers over an unsecured network using a Client/Server relationship. It is a program that can be used for logging into a remote machine and for executing commands on that machine through an encrypted tunnel. If you are looking for instruction on how to install and configure SSH on your computer, refer to the steps listed below.
01
Create A Static IP Address
Setting a static IP address will ensure the host IP address does not change over time when trying to connect from the client. This change often occurs when the IP address lease is renewed. To create a static IPv4 local address... 4 pieces of information will be required (gateway address, netmask, DNS servers and the available IP range.
1. Gateway Address (ie. 192.168.1.1)
The gateway address is the local IP address of the router. To find it on your system, use the following command.
| netstat | network statistics tool |
| -rn | routing table (numerical values) |
2. Netmask (ie. 255.255.255.0 or /24)
The netmask address us used to indicate how many bits of the IP address will be used to identify the network and how many will be used to identify the host. Use one of the two following commands to find this information.
| ifconfig | network information (preferred but deprecated) |
| ip addr show | network information (fallback) |
3. DNS Servers (ie. Router IP / 1.1.1.1)
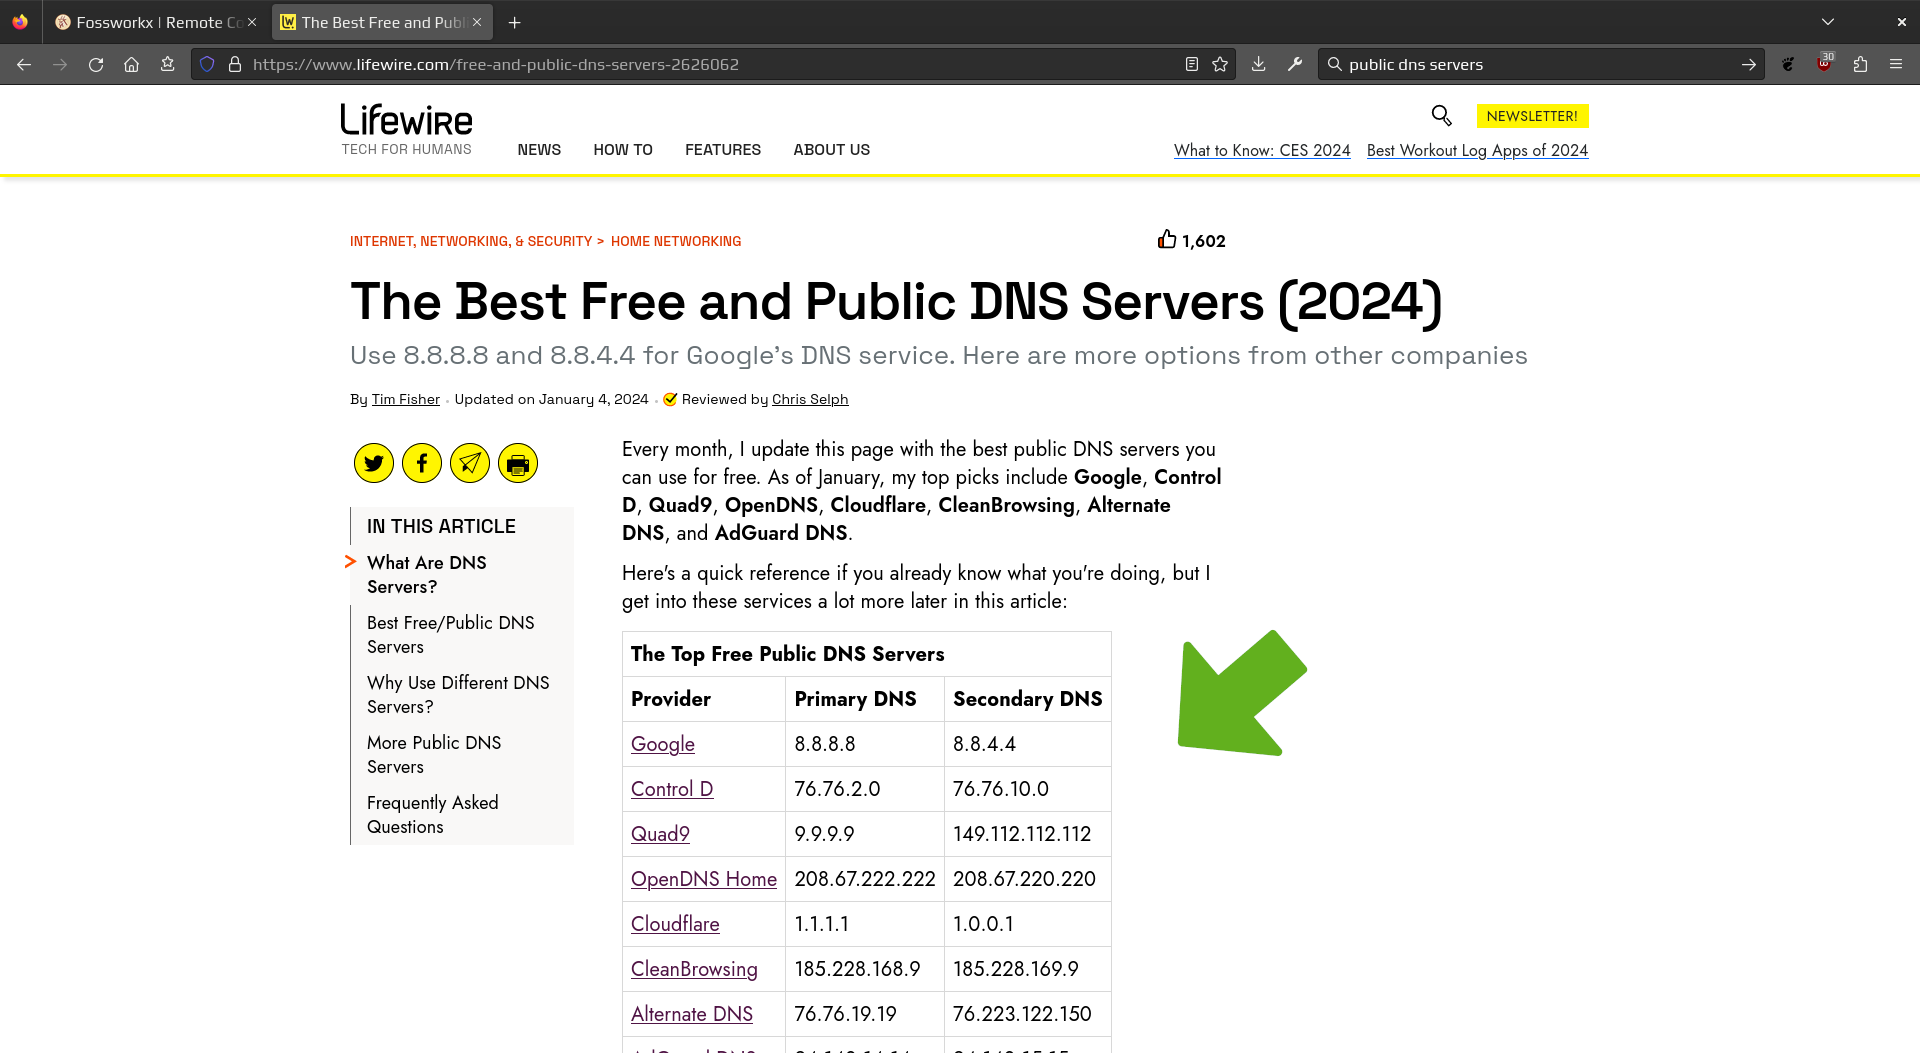
DNS Servers are used to resolve the IP address of a particular website to it's domain name. These servers are typically set up by your ISP and reside within your router. Because of this, the IP address of the router can be used, or additional servers can be added. To search for a list of public DNS servers, open the browser and search for public dns servers.
4. IP Range
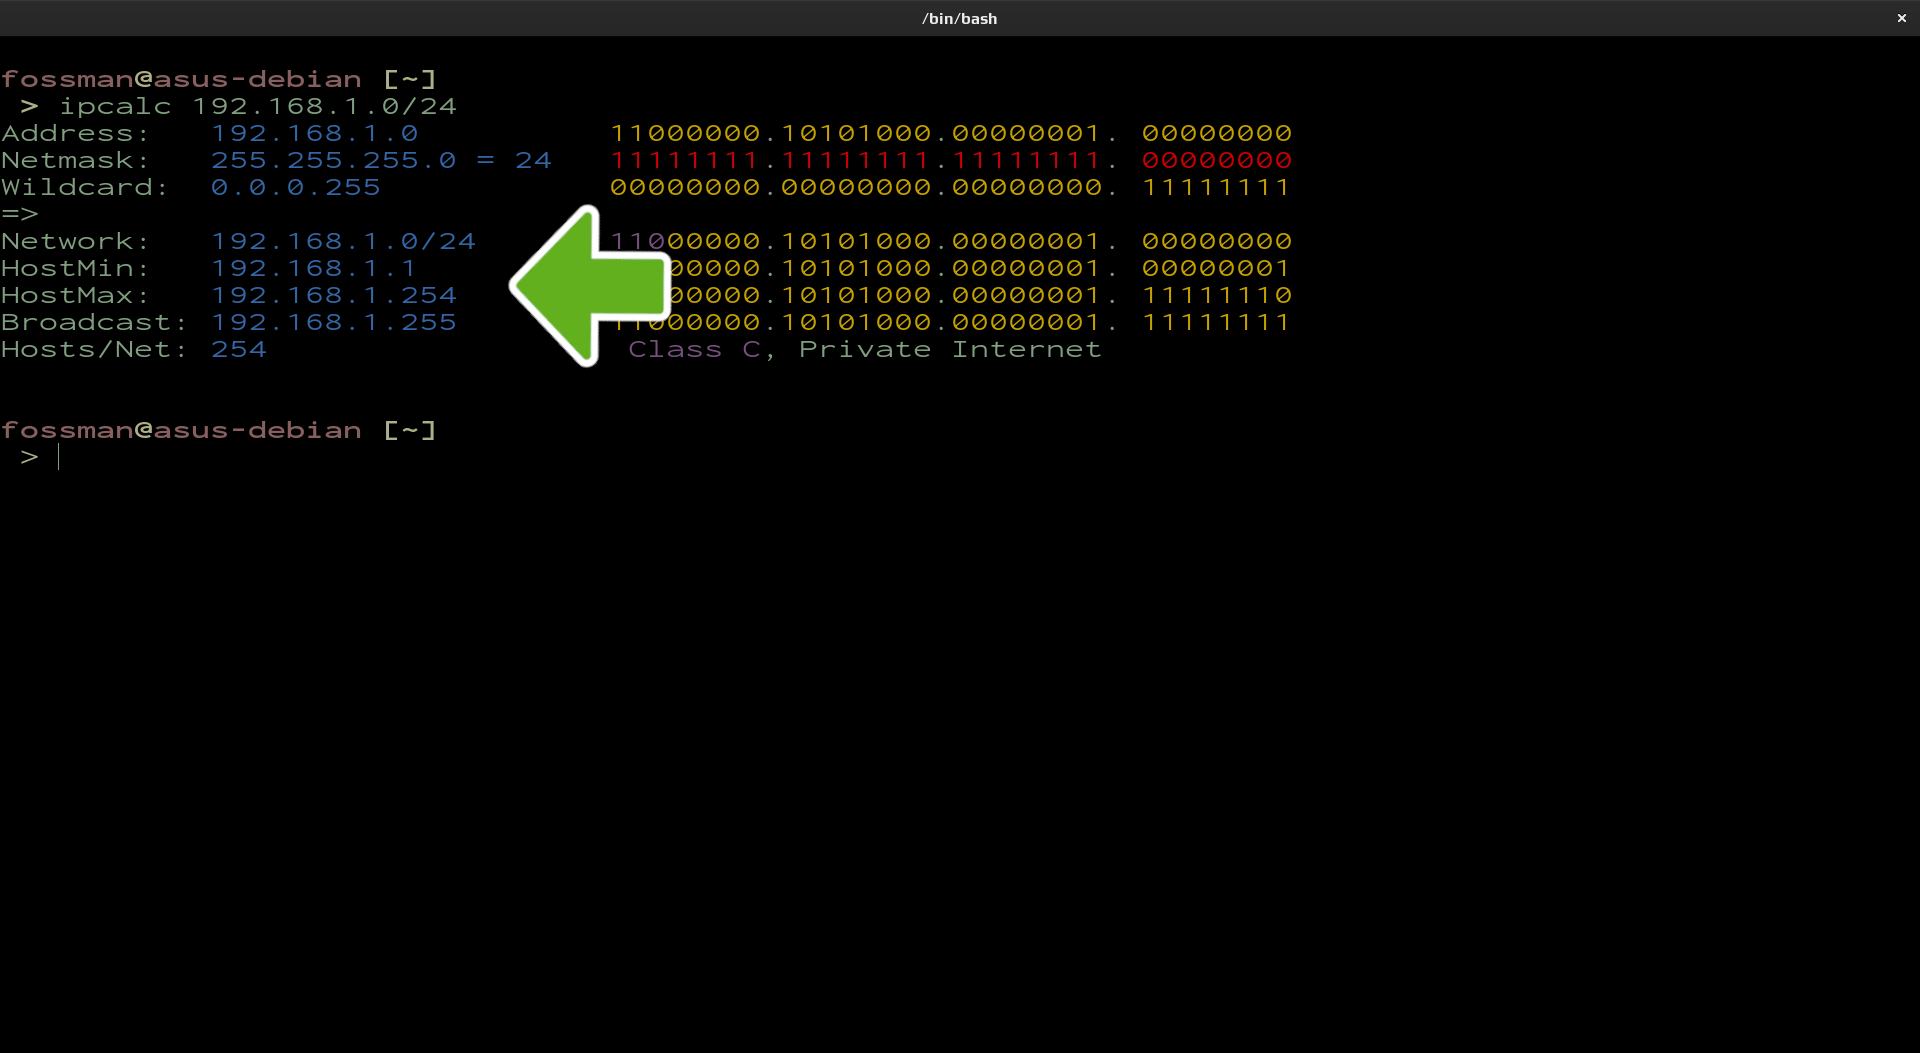
The Static IP address that you choose to use will need to fall within a specific range defined by the network. To find this range, a tool such as ipcalc can be used. Use the first following command to install the tool if it isn't already on your system, then the second to run it, which will return your network's IP range. This example will be using a 192.168.1.0 subnet with a netmask of /24.
fossman@linux-server:~$ ipcalc 192.168.1.0/24
Find range using the Gateway address
If your not sure what these values are, just use the local IP address of your gateway/router.
| sudo | super user do |
| apt | package manager |
| install | package manager action |
| ipcalc | ip calculation tool |
| 192.168.1.0/24 | network id / netmask |
| 192.168.1.1 | gateway ip address |
Scan entire subnet
Choose any address that falls within the HostMin and HostMax range. In this example, any value between 192.168.2 and 192.168.1.254 can be used. With the exception of 192.168.1.1 as it will be already taken by the router. To ensure there are no other devices on the network using the IP address that you have chosen to use, the nmap command can be used to scan the network. The IP address in the command below is the network id, which can also be found using the ipcalc tool used above.
| nmap | nework mapping service |
| -sn | simple ping scan |
| 192.168.1.0/24 | network id / netmash |
Set the local static IPv4 address
Now that all of the required information has been found, the static IP address of the device can be set. Open the network settings, choose your current connection, click on the IPv4 Settings tab and select Manual. Next, input the found network information into the fields as in the screen-shot below. In this example, the IP address of the router was used as the 1st DNS server and 2nd was added which belongs to Cloudflare that will be used as a backup.

Confirm the static IP address has taken effect.
When complete, save the changes and either restart the NetworkManager or reboot your machine. Then use the following command to ensure the change has taken effect.
| ip | name of service |
| addr | address |
| show | show ip information |
02
Firewall Rules
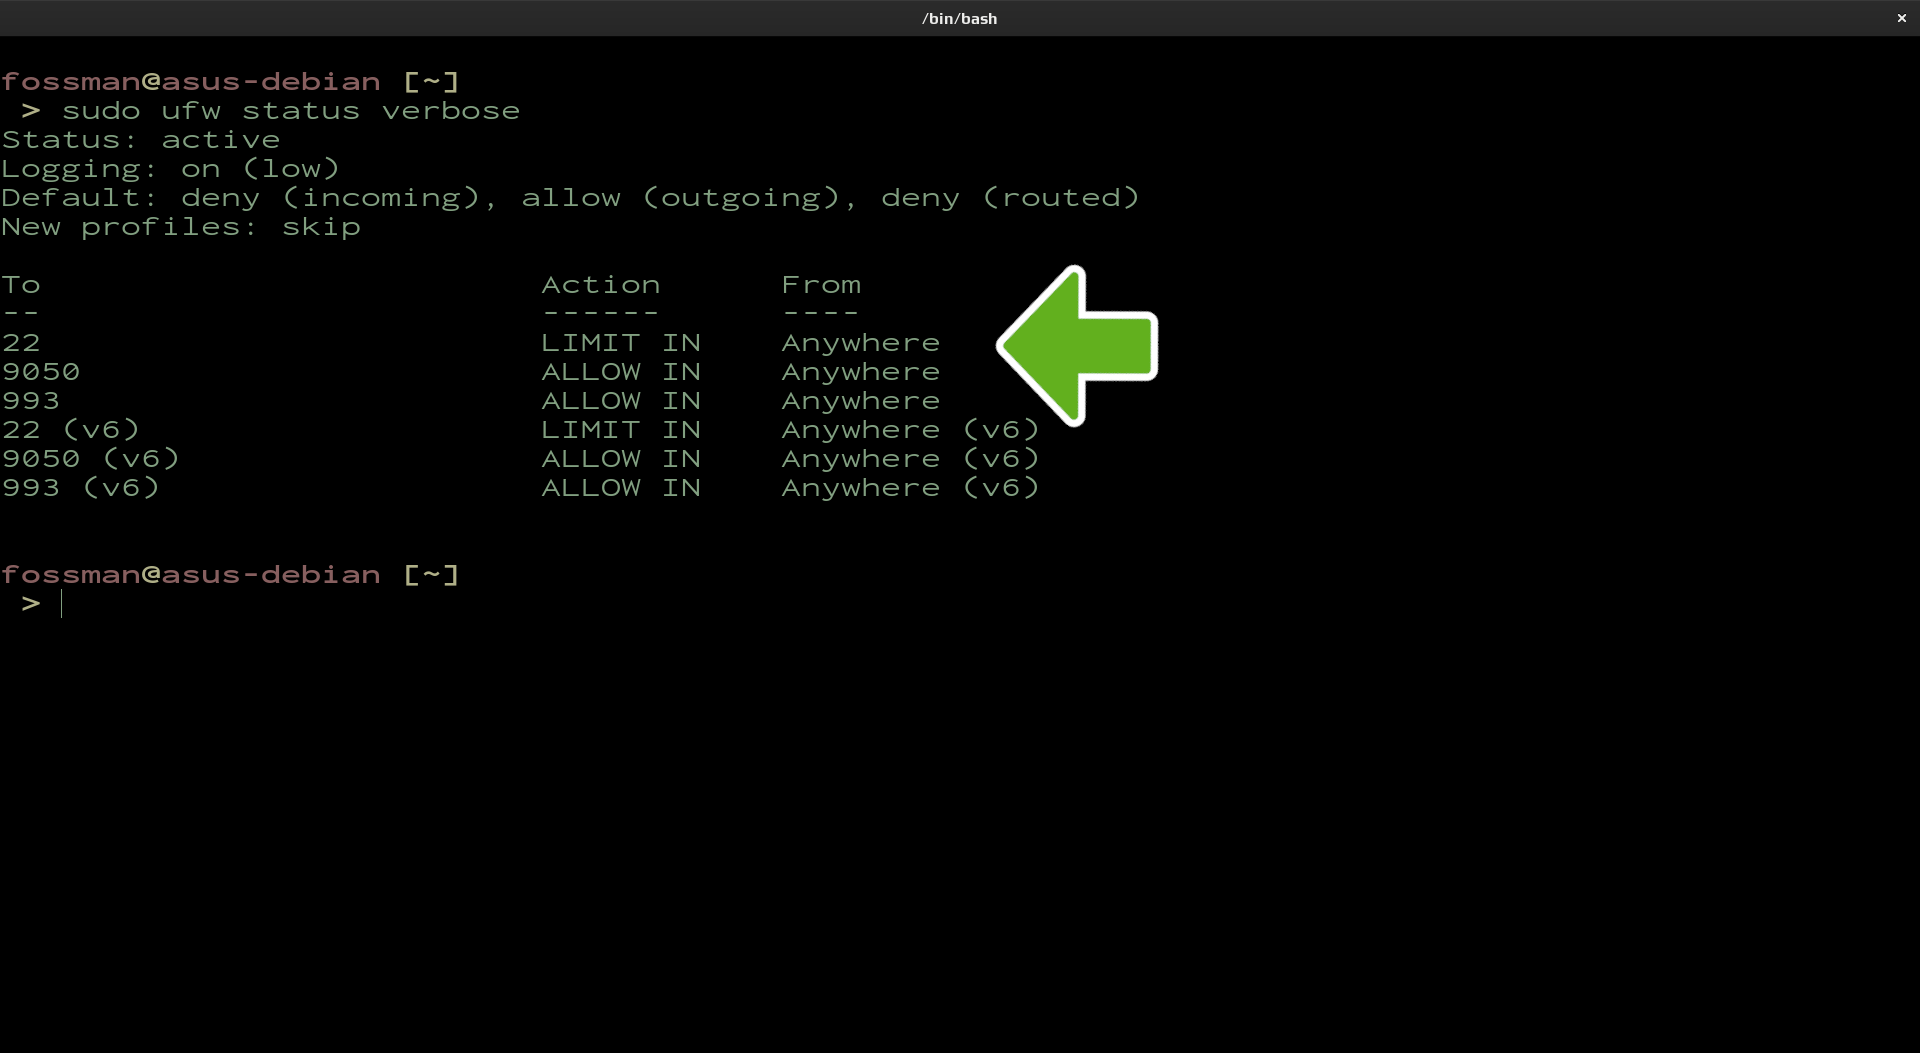
SSH by default will be using port 22 to connect to other devices on the network. If this port is not allowed in the firewall, these attempts will be blocked. To allow SSH or port 22 through your firewall, use the following command. As a security measure, using limit as an argument will limit the amount of login attempts allowed. If security is not a concern, allow can also be used. After which, use the second command to confirm the change.
Allow SSH through firewall
fossman@linux-server:~$ sudo ufw status verbose
| sudo | super user do |
| ufw | firewall service |
| limit | limit login attempts |
| ssh | name of service |
| verbose | produce detailed output |
03
Install Client/Server
Most Linux distributions will have the openssh-client installed by default. This will allow for a connection to a host which has the openssh-server installed and running. To connect to your computer over a network through a different machine, you'll need to install the openssh-server. Use the following command to do so.
Install openssh-server
| sudo | super user do |
| apt | package manager |
| install | package manager action |
| openssh-server | package to install |
04
Status Commands
Use the following commands to start, stop and check the status of the SSH server. Use the first command if you are using systemd and the second for alternative init systems. If you are not sure which one you are using, just try both if the first command fails.
openssh-server status
fossman@linux-server:~$ sudo service ssh status
Start the server
fossman@linux-server:~$ sudo service ssh start
Stop the server
fossman@linux-server:~$ sudo service ssh stop
Enable the server on startup
fossworkx@linux-server:~$ sudo service ssh enable
| sudo | super user do |
| systemctl | systemd services manager |
| service | system V services manager |
| ssh | ssh service |
| status, start, stop, enable | service action |
05
Basic Login
To login to a remote SSH server, a username and the IP address of the host will be required. This example will be using fossman as a username and the host IP address will be 192.168.1.200
Basic login
| ssh | call ssh |
| fossman@ | username at |
| 192.168.1.200 | sever IP address |
After the first login, the user will be prompted with an additional warning and the fingerprint of the host machine will be added to the known_hosts file.
This warning states the server has been added to the list of Known Hosts. Type in the password and hit enter. The connection to server should now have been established. Also, take note of the change in the prompt.
To login without having to provide a username and IP address, create the configuration file called config in the ~/.ssh directory. Refer to the next step for instructions.
06
Configuration File
Creating a configuration file in the .ssh directory will allow you to login to the server by only providing the hostname of the computer you are logging into. To accomplish this, use the following commands to create the file.
Navigate into the .ssh directory
Create the file and open
| cd .ssh/ | navigate into .ssh directory |
| nano config | open config with nano |
Edit the config file
Add the following text to the file. This example will be using media-server as the hostname, 192.168.1.200 as the IP address of that host, port 22 (default) and a username of fossman. Multiple servers can also be added separate by a space.
Hostname 192.168.1.200
Port 22
User fossman
Use ctrl+o to save the file and ctrl+x to close. Now to login, only the hostname will be required. Provide the password when prompted.
| Host media-server | hostname of host |
| Hostname 192.168.1.200 | ip address of host |
| Port 22 | port used to connect |
| User fossman | username on server |
Login and provide passphrase when prompted
To bypass having to provide a passphrase, a RSA key pair will need to be created. After doing so, the public key will be copied to the remote server. For instructions, proceed to the next step.
07
Create RSA Key Pairs
These key pairs are used to add additional security and bypass the password prompt. They are generated on the client computer. After which the public key is then copied to the host machine. Use the following command to create the keys.
Create the key pair
After executing the command, two keys will have been created. id_rsa and id_rsa.pub
Copy the public key to the server machine
Use the following command to copy the public key to the host machine. This example will be using fossman as the username and 192.168.1.200 as the host IP address.
Login to the server (no passphrase required)
It will now be possible to login to the host computer without having to provide a username or passphrase. If the configuration file in the previous step was created, only the hostname will be required.
| ssh-keygen | create RSA keys |
| ssh-copy-id -i | copy public key |
| ~/.ssh/id_rsa.pub | public key location (client) |
| fossworkx@ | username at |
| 192.168.1.200 | server IP address |
| media-server | server hostname |
08
Secure Application
Adding the SSH key pairs in the step above will add a great amount of security to the server and is more then acquitted for the majority of users. If you would like to add even more security, password authentication can also be disabled. Use the command below to change this setting.
To disable this feature, use the following command. Just make sure you are able to login to the server using the public keys created in the last step, as you will not be able to login to the server with the password. The file will first need to be opened to edit it's contents. Use the following command
Open the ssh config file for editing
| sudo | super user do |
| nano | text editor |
| /etc/ssh/ssh_config | path to config file |
Disable password authentication
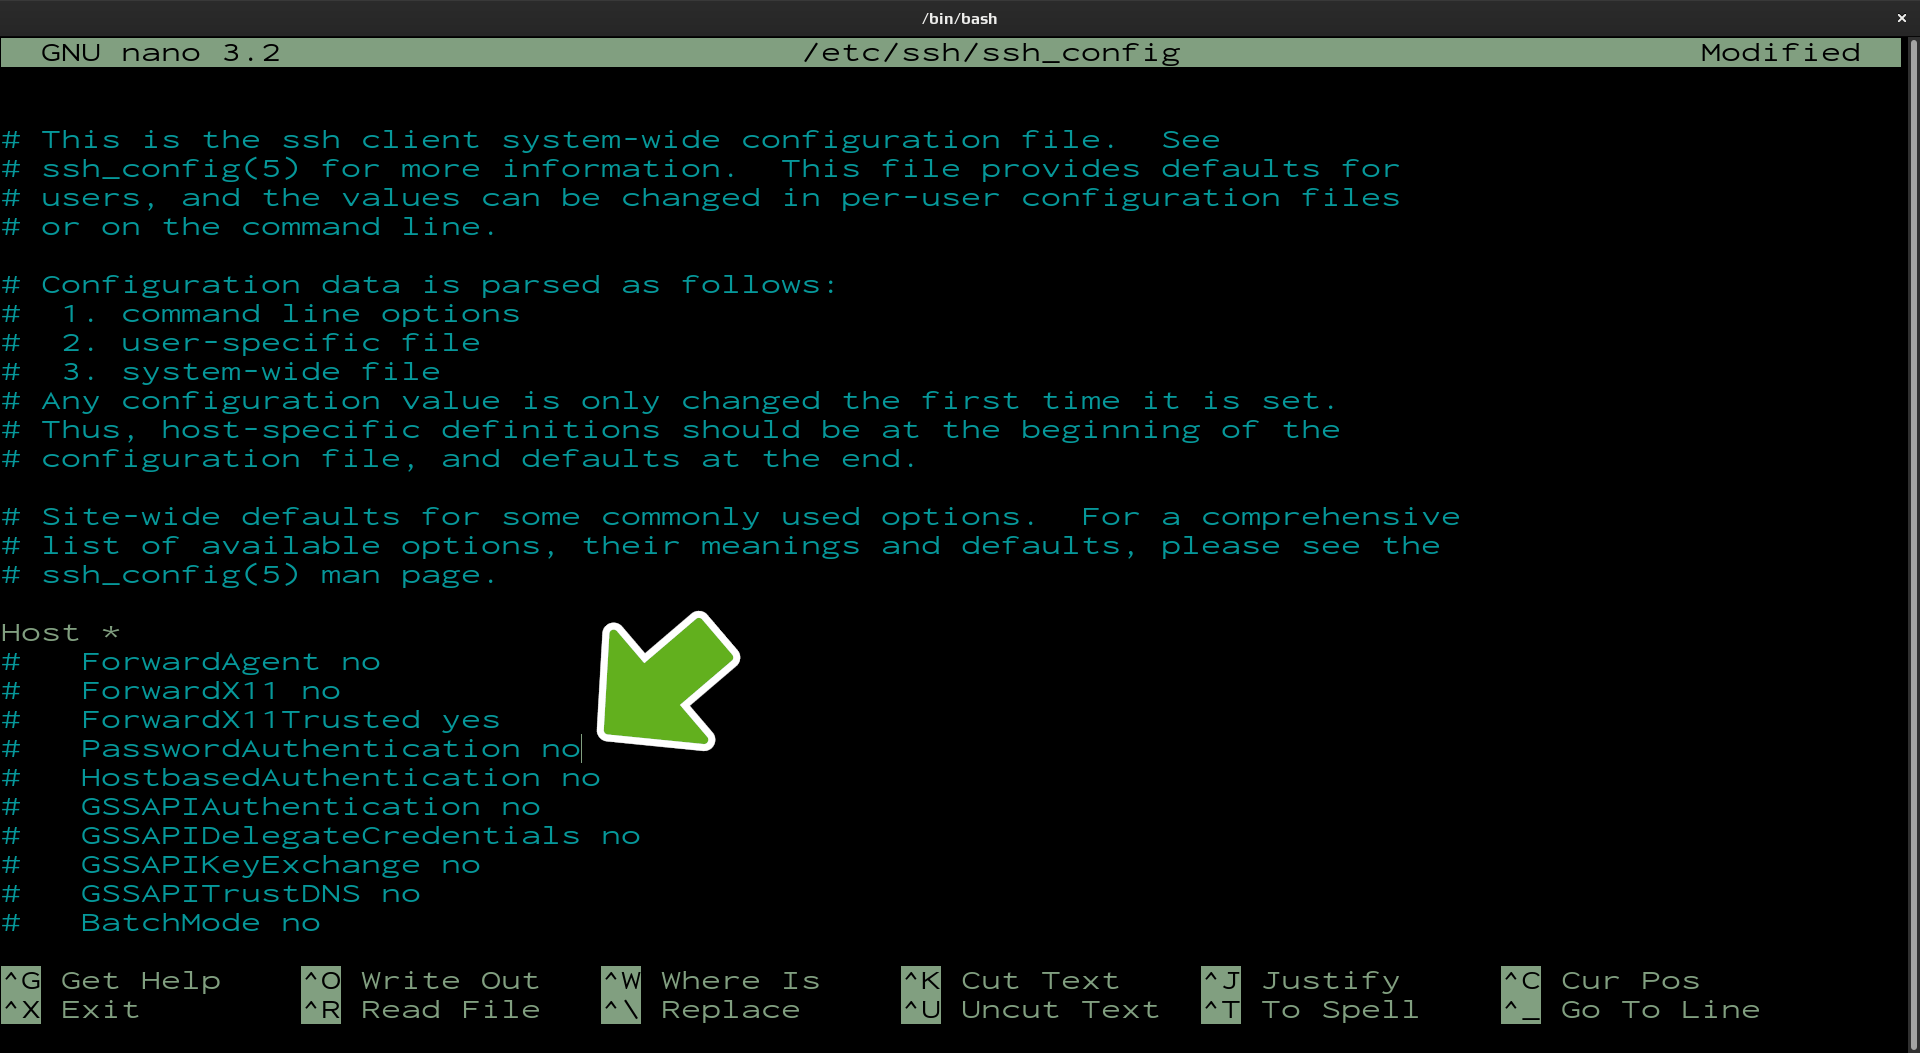
The sshd_config file will now be open and ready to edit. To disable PasswordAuthentication change the current value of this parameter from yes to no. Similar to the screen-shot below
SFTP

SFTP (Secure File Transfer Protocol) is a file transfer program, similar to ftp, which performs all operations over an encrypted ssh connection. It also uses many features of SSH, such as public key authentication and compression.
01
Login
Logging in to SFTP is very similar to SSH. Only the username and the IP address of the host are required, with the addition of having the ability to use the same RSA keys that were created for SSH.
Disable password authentication
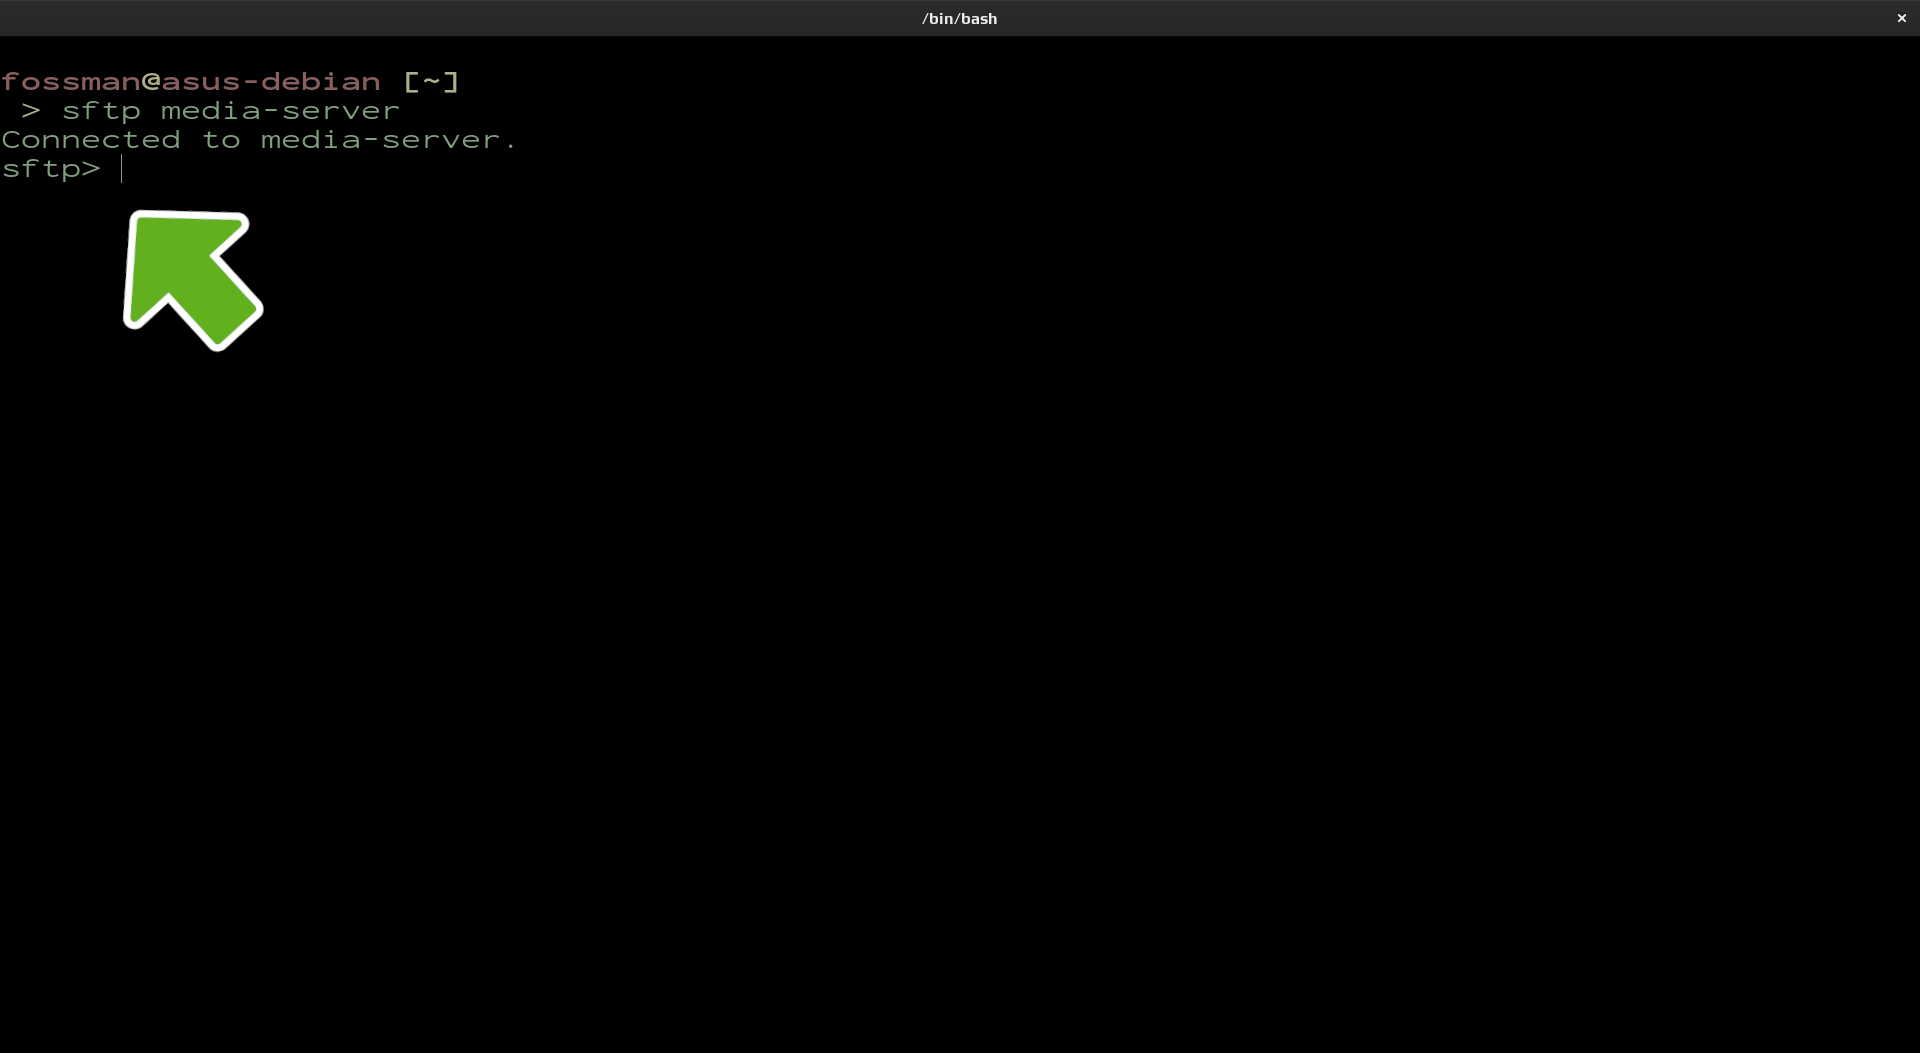
Use the following command to log into the sftp server with a username and host IP address and the second if you have already created the RSA keys. This example will be using fossman as the username, 192.168.1.200 as the host IP address and media-server as the hostname.
fossman@linux-server:~$ sftp media-server
| sftp | call sftp |
| fossman@ | username at |
| 192.168.1.200 | server IP address |
| media-server | server hostname |
After a successful login, you will be presented with the sftp> prompt. From here you can navigate through directories, view files, download files and upload files.
02
Navigation
Navigating through directories on the sftp server is very similar to how it would normally be done. The pwd command is used to show the location of the current working directory and the cd command can also be used to change the current directory.
Show the current working directory
Use the first command to print the location of the current working directory of the host machine, and the second to print the current working directory of the local machine.
sftp> lpwd
| pwd | present working directory (server) |
| lpwd | present working directory (client) |
| Documents | directory name |
As you can see, the command for the local machine was the same with the addition of the l at the beginning. To change the current working directory, use the commands below.
Change the current working directory
Use the first command to navigate into the Documents directory on the server machine and the second to navigate into the Documents directory on the client.
sftp> lcd Documents/
| cd | change directory (server) |
| lcd | change directory (client) |
| Documents | directory name |
As you can see, the command for the local machine was the same with the addition of the l at the beginning.
03
View Files
Viewing files on a sftp server is very similar to how they would be normally viewed within the current directory using the ls command. When this command is used after logging into the server, the files in the current directory of the server will be shown. To show the files contained within the local directory of the client machine, use the lls command.
Show the contents of the current working directory
server machine and the client machine
sftp> lls
| ls | list host storage |
| lls | list local storage |
04
Downloading Files & Directories
Downloading a file or directory from the server machine to the client can be done with the get command. Use the first command if you would like to download a file and the second to download a directory. These files and directories will be downloaded to the current working directory of the client.
Downloading files and directories
sftp> get -r directory_name
| get | download |
| example.txt | file to download |
| -r | recursive (directory) |
| example | directory to download |
05
Uploading Files & Directories
Uploading a file or directory from the client machine to the server can be done with the put command. Use the first command if you would like to upload a file and the second to upload a directory. These files and directories will be uploaded to the current working directory of the server.
Uploading files and directories
sftp> put -r example
| put | upload |
| example.txt | file to upload |
| -r | recursive (directory) |
| example | directory to upload |
SSHFS

SSHFS stands for Secure Shell File Sharing. It allows for a directory to be created where it's contents can be shared with other clients on the network. Other programs also offer this functionality, but are much heavier on system resources.
01
Creat A Shared Directory
The example below will sync the contents of the Documents directory on the server machine with a directory created on the client called Shared-Documents. Make sure the RSA keys have been generated and tested before continuing. The IP address of the host machine in this example will be 192.168.1.200
Create a shared directory
Share contents of the Documents directory on the server machine with the client.
| sshfs | call sshfs |
| 192.168.1.200:Documents/ | server directory contents |
| Shared-Documents/ | client directory contents |
| -o reconnect | reconnect to server |
All of the contents in the Documents directory on the server machine should now be accessible from the Shared-Documents directory on the client.
02
Disconnect From Host
To disconnect from the host, use the following command.
Disconnect shared directory
| umount | unmount shared directory |
| Shared-Documents | directory to unmount |
NETCAT

Ncat is known as the swiss army knife of TCP/IP. It reads and writes data across network communications, designed to be a reliable backend tool which uses both TCP & UDP protocols. It also functions as a server, waiting for inbound connections and is commonly used for troubleshooting purposes.
01
Install Netcat
Use the commands below to install Netcat on you system
Install Netcat
fossman@linux-server:~$ sudo apt install netcat
Show list of available options
| nc | call ncat |
| -h | help page |
02
Start Listening (client)
It is quite simple to build a very basic client/server model using ncat. Before the client is able to connect with the server, it first needs to start listening. The following command will cause ncat to listen on port 6767. Any port that is not already in use can be used.
Listen on port 6767
| nc | call ncat |
| -l | listen |
| -p | port |
| 6767 | port |
03
Open Connection To Listening Client
Use the command below to open a connection to the client machine. In this example, the client will have an IP address of 192.168.1.200 and will be listening on port 6767.
Open connection to listening client
Provide IP address of the client and listening port
| nc | call ncat |
| -v | verbose output |
| 192.168.1.200 | client IP address |
| 6767 | listening port |
After executing the command above, a connection with the client will have been established. To send a message to the client, type in your message and hit enter. After which, the message will appear on the clients screen.
Sending a message back to the server is as simple as the one sent to the client. Just type it in and hit enter. After which, the response message will appear on the server's machine.
04
Sending Files
To send a file from the server to the client, the following command can be used. Instead of the data being returned to standard out (terminal screen) it will be redirected to a text file called incoming.txt
Start listening from the client machine
| nc | call ncat |
| -l | listen |
| -p 6767 | port to listen on |
| >incoming.txt | redirect output to incoming.txt |
Send the contents of example.txt on the host to incoming.txt on the client
| nc | call ncat |
| -w3 | timeout after 3 seconds |
| 192.168.1.200 | client IP address |
| 6767 | listening port on client |
| >example.txt | send contents of example.txt |
05
Create A Reverse Shell
Creating a reverse shell is not only useful for transferring data, it will allow for code execution on the host machine from the client. Commonly known as a back-door. To set up a reverse shell, use the following commands. The first command will be from a Linux client and the second will show an example from a Windows client.
Client (Linux)
Establish a listening port from the bash terminal
| nc | call ncat |
| -lp 6767 | listen on port 6767 |
| -e | execute a program |
| /usr/bin/bash | program to be executed |
Client (Windows)
Establish a listening port from the windows command prompt
| nc | call ncat |
| -lp 6767 | listen on port 6767 |
| -e | execute a program |
| cmd.exe | program to be executed |
Now with the client listening, the connection can be made from the host/server. Use the following command.
Host/Server (Linux)
Establish a connection with the client
| nc | call ncat |
| 192.168.1.200 | client IP address |
| 6767 | listening port |
06
Banner Grab
Used to collect information about the server running the application and the software it is using. You will first need to get the IP address of the target website, open a connection, then dump the information in the banner. Use the following commands.
Return IP address of example.com
| ping | call ping |
| -c3 | run three times |
| example.com | target website |
Open connection to target
| nc | call netcat |
| target_ip | IP address of target |
| 80 | http port |
Dump banner information
After executing the command above, a prompt will be provided. Enter the following and hit enter

