POST INSTALL

Now that your system has been installed, it can now be configured to include the ability to connect to your system remotely, additional required software can be added and the home directory can be populated from your backup drive. The following documentation will offer instructions on how to accomplish the following.
UPDATE & UPGRADE

Updating and Upgrading the system is required soon after the distribution has been installed. This is due to the fact the ISO image that was downloaded could have been on the server for an undetermined amount of time, resulting in packages contained on the ISO image to be out of date. This is typically the first order of business after every operating system install.
01
Check For Available Updates
Use the following command to check the repositories for available updates. If running this command for the first time there will most likely be a fair amount of updates. These will include all of the updates and patches that have followed since the distribution was released. Running this command only checks for these updates, but does not install them.
Check for available updates
02
Update & Upgrade System
If you would like to install these updates, use the following command. Using the dist option will also remove any packages that where replaced and no longer needed, along with older kernel versions. Use the second command if you would like to keep these files on the system. This can be useful if you need to revert back to an older kernel in the future.
Install updates
Reboot the system
Due to the size of the initial update and upgrade it is suggested to restart the machine when it is complete. Proceeding updates typically do not require a system reboot unless the kernel or other pertinent software has been upgraded.
DOT FILES

The .bashrc, .profile and sources.list are critical system files that should to be backed up before they are configured. You may not need to do this now, but you'll be surprised how often you'll want to edit these files in the future. The following commands will back up each of these files with the same name, adding the .bak extension, located in the same directory.
01
.bashrc
Use the following command to backup your .bashrc file. This file is run each time the terminal is open. It can be used to configure the prompt, includes system variables, aliases and various functions which aid in the operation of the system. Use the following command to backup this file.
Backup .bashrc
Duplicate the file adding the .bak extension.
02
.profile
Customization for the shell is included here. This file is executed each time a user logs in and starts the shell session. this file will also be loaded if the is unable to find the .bash_profile file. Any scripts you would like to run on system boot can also be placed here. Run the following command to back it up.
Backup .profile
Duplicate the file adding the .bak extension.
03
sources.list
This is a file which contains a list of repositories that directs the system on where to find it's packages. Making a mistake configuring this file can disable the systems ablitity to update it's packages. To back it up, use the following command
Backup sources.list
Duplicate the file adding the .bak extension.
UFW FIREWALL

Most distributions will come with a firewall pre-installed called ufw (the Uncomplicated Firewall) to check if it is installed and up and running, use the following command. If you prefer to use a graphical application check your application menu as gufw may already have been installed on the system by default.
01
Firewall Status
Check to see if the system has a firewall pre-installed. This command will also show any rules that have been applied. Use the following command to check it's status.
Show status of firewall
Use the verbose option to return more information.
02
Install UFW (Uncomplicated Firewall)
If the system was unable to find it, it's not installed. Use the following commands to do so.
Install the UFW firewall
The first command will update the repository list before installing the application.
fossworkx@linux-server:~$ sudo apt install ufw
03
Enable UFW
After it has been installed, enable it on startup
Enable on startup
Use the second command to confirm.
fossworkx@linux-server:~$ sudo ufw status verbose
04
Add / Remove Rules
By default, no rules will be applied. If you would like to add any, the following commands can be used. In this example a rule for ssh will be added to the firewall which will allow all connections from this protocol
Allow SSH
Use the second command to confirm
fossworkx@linux-server:~$ sudo ufw status verbose
Remove the rule
To remove a rule, use the following commands
fossworkx@linux-server:~$ sudo ufw delete rule_number
SOFTWARE

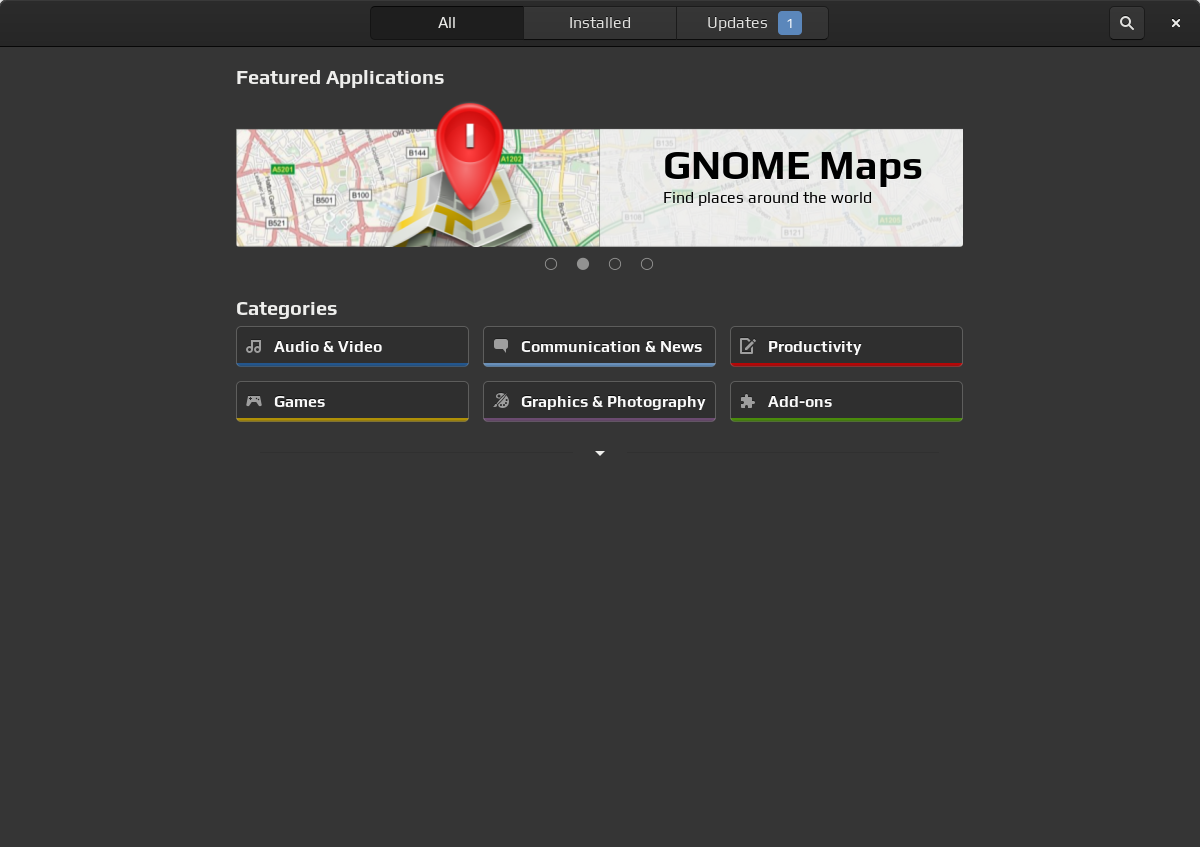
At this point, your system will now be up to date, the firewall has been installed and configured and important system files have been backed up. Which would make it a great time to install some additional software and tools you may require. This process can be done with the Software Manager or through the terminal which can offer many additional benefits. Such as the ability to simultaneously install multiple packages and install packages from Github.
Adding & Removing Applications
Software Manager
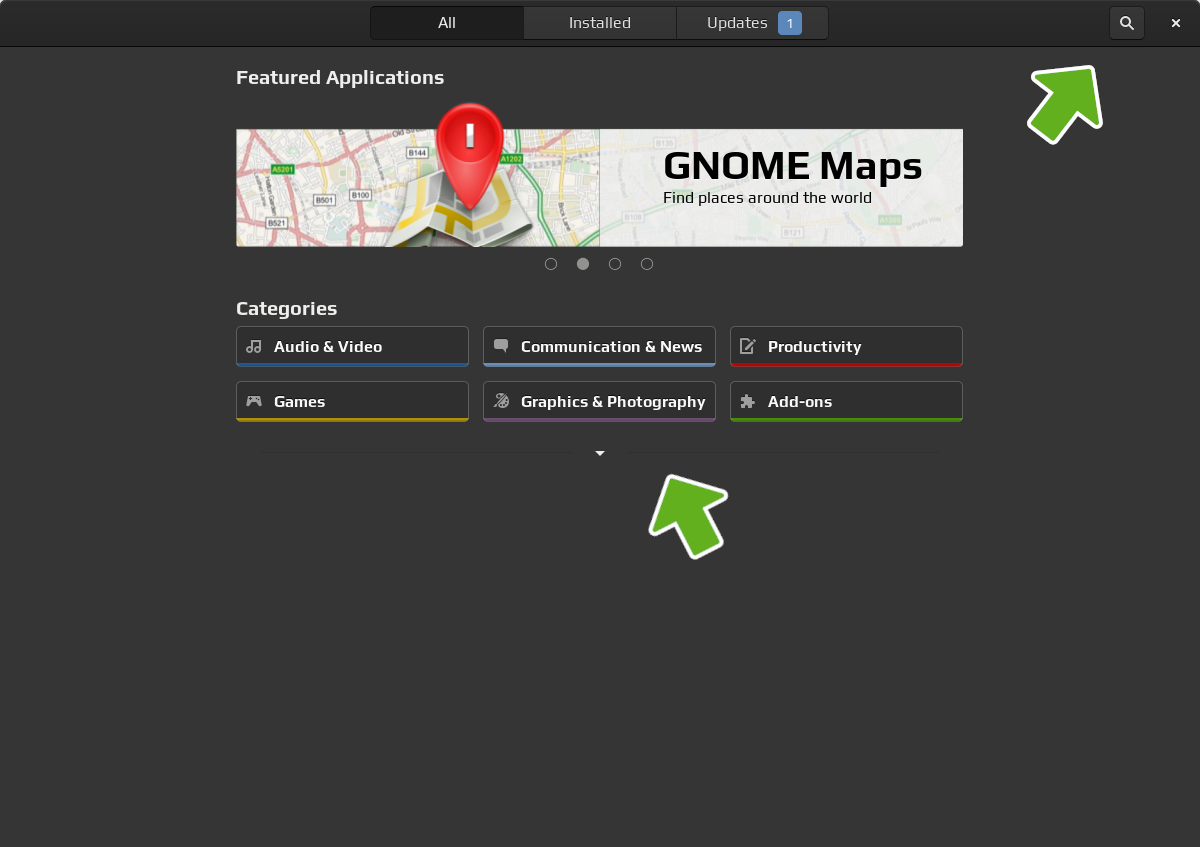
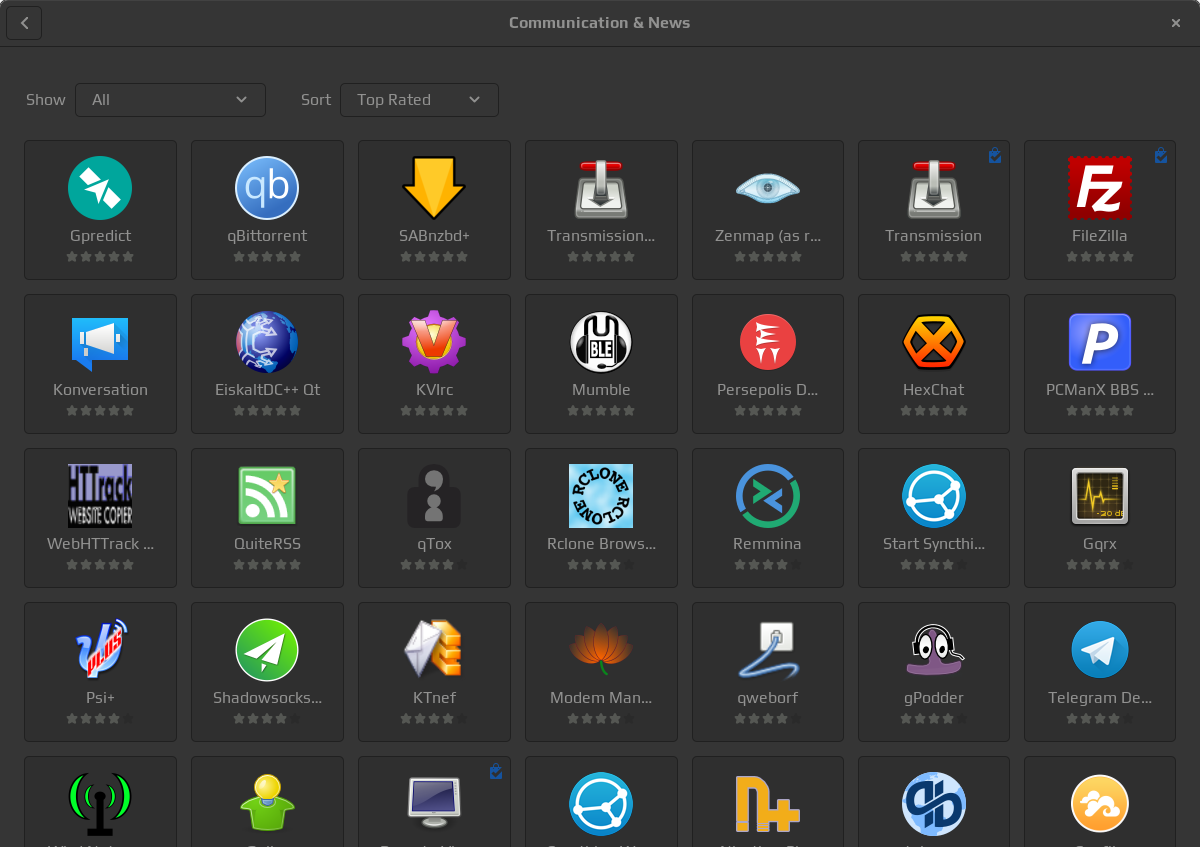
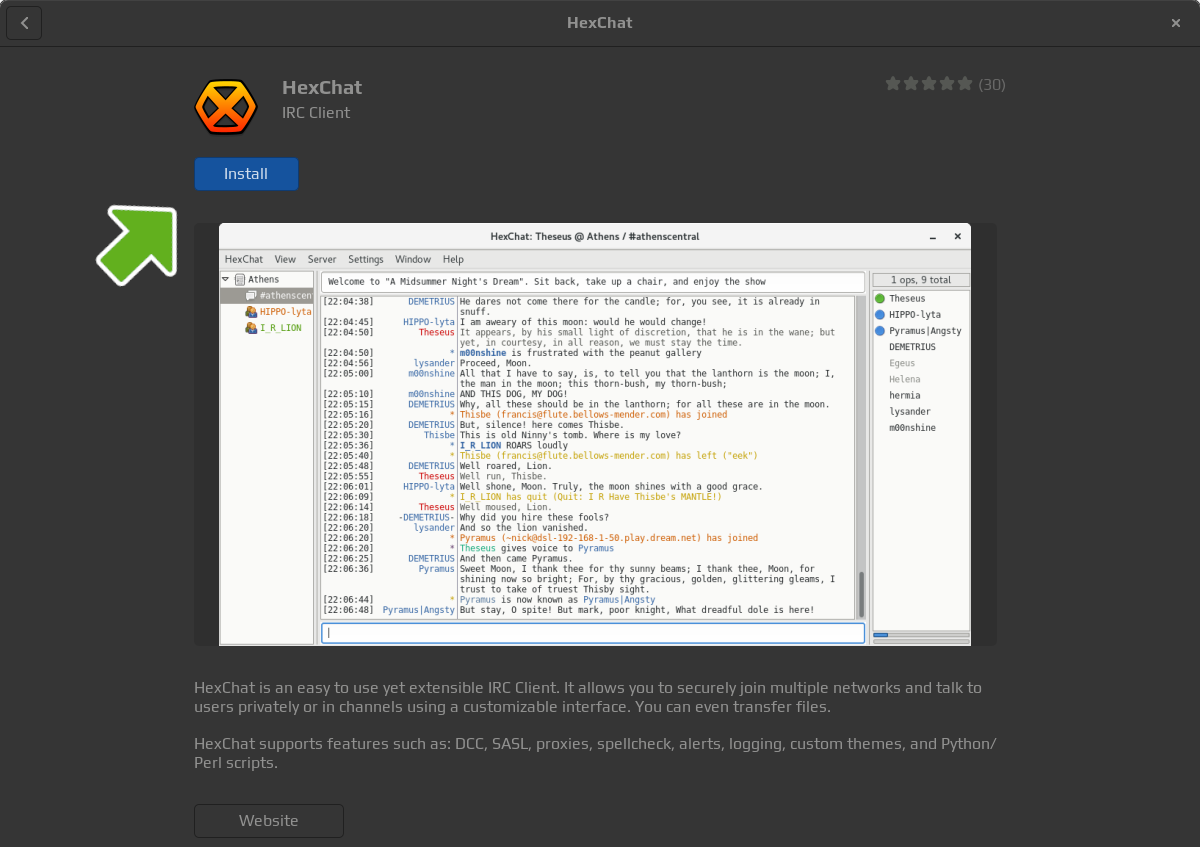
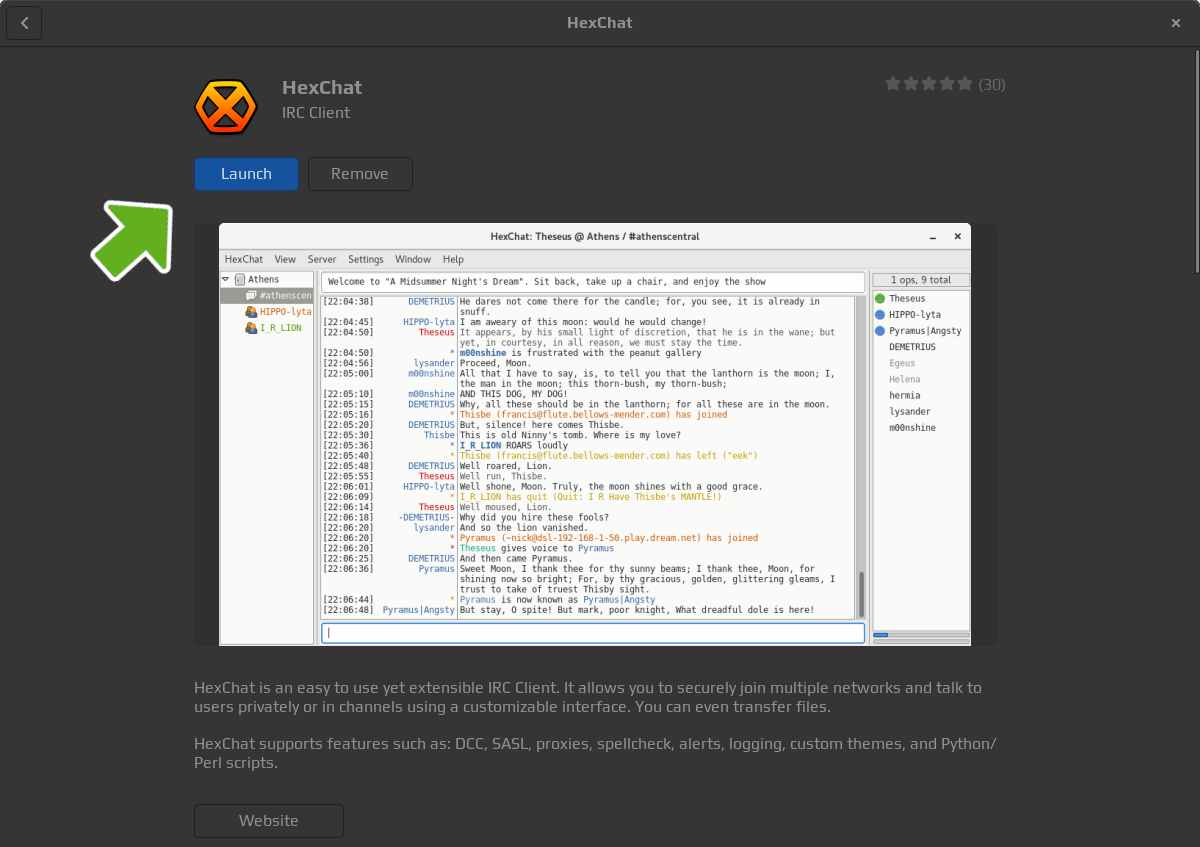
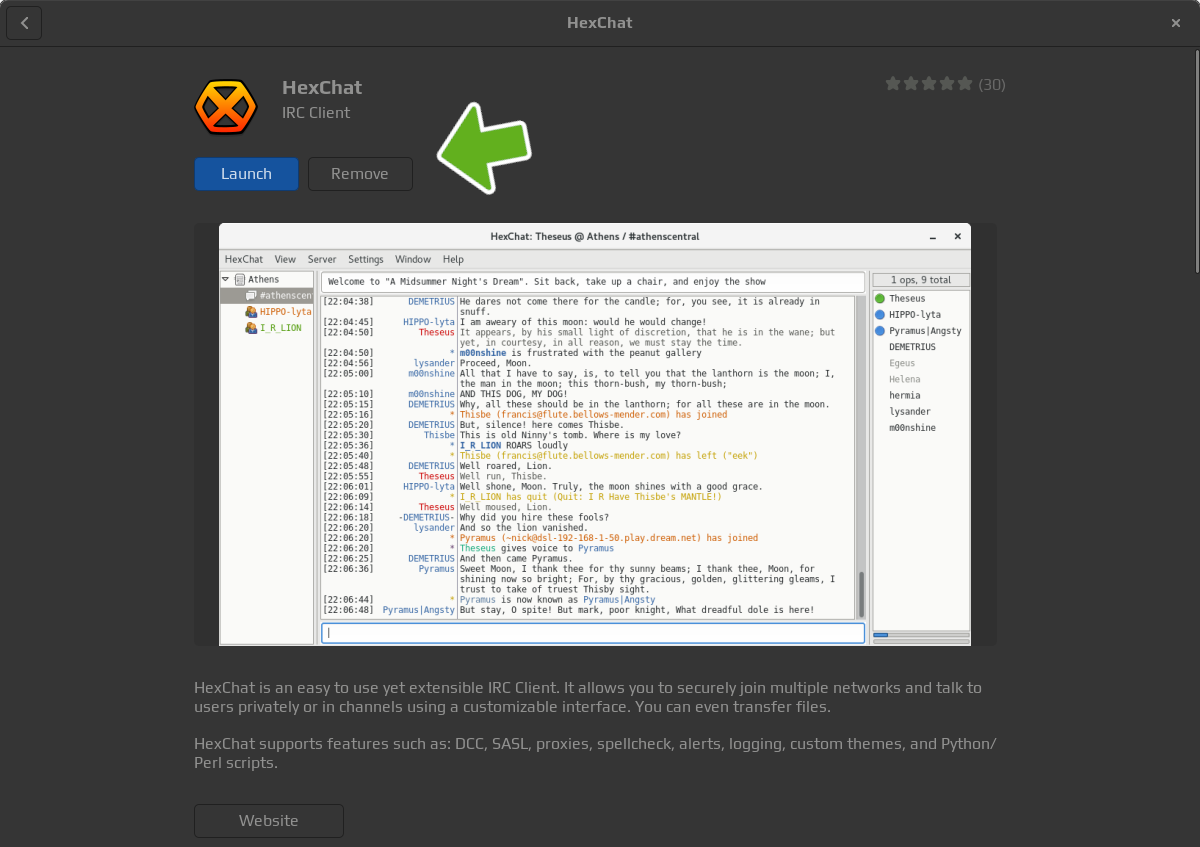
Use the following steps to install applications using the Software Manager
01
Adding & Removing Applications
Terminal
Use the following instructions, if you would prefer to use the terminal.
This method will also allow you to install multiple packages at the same time.
01
Terminal (single package)
Verify name and check availability
Verify the package is in the repository
This can be done using the search command
Package information
Show information about the package
Install the package
Use the first command to update the repository list and the second to install the package
fossworkx@linux-server:~$ sudo apt install package_name
02
Terminal (multiple packages)
Multiple packages can be installed in a single command. Each one seporated by a space, or read from a text file
Install multiple packages with dependencies
fossworkx@linux-server:~$ sudo apt install package_01 package_02 package_03
Install multiple packages specified by a text file
Adding & Removing Applications
downloaded deb packages
If you were are unable to find the package you were looking for through the repositories, downloading it from the browser is another option. Just open up your browser and download the .deb package directly from the website that hosts the application.
After the file has been downloaded it can be installed by either double clicking it, or by running the dpkg command. Installing the package through the terminal will also indicate if there were any errors during the install. These error messages will also guide you in the right direction on how to correct these problems if they arise.
01
Installing .deb Packages
Installing .deb packgages can be done with the following commands. Installing multiple packages can be done by seporating each one by a space, or specified from given directory. If there are any dependency errors, they can be resolved by following the instructions in the next step (2).
Install a single .dep package
Use the following commands to install a .deb package located in the current working directory
fossworkx@linux-server:~$ sudo dpkg -i package_name
Install multiple .dep packages
Use the following commands to install multiple .deb packages located in the current working directory
fossworkx@linux-server:~$ sudo dpkg -i package_01 package_02 package_03
Install all deb packages located in a given directory
The command below will install all .deb packages located in the Downloads directory.
fossworkx@linux-server:~$ sudo dpkg -i ~/Downloads/*.deb
If there were any dependency errors, use the following commands to download and install the missing packages to resolve these dependency erros.
02
Resolve Dependency Errors
The following commands will verify which dependencies are missing on the system.
Resolve dependency errors
If any missing dependencies were found you will be asked if you would like to install them.
Verify dependencies were resolved
If nothing is returned, no erorrs were found
Adding & Removing Applications
github repository
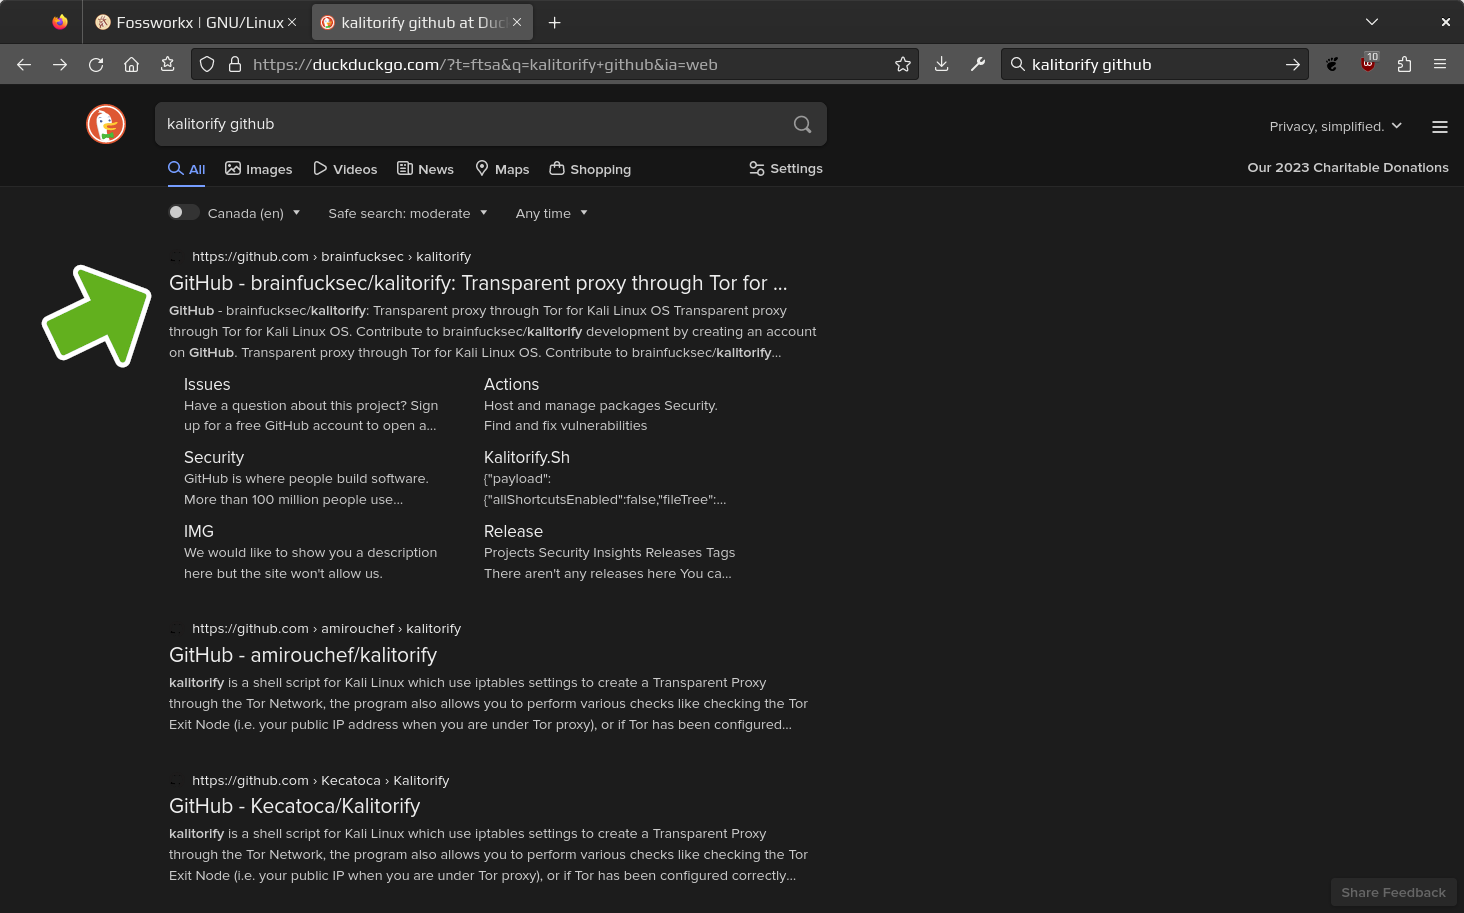
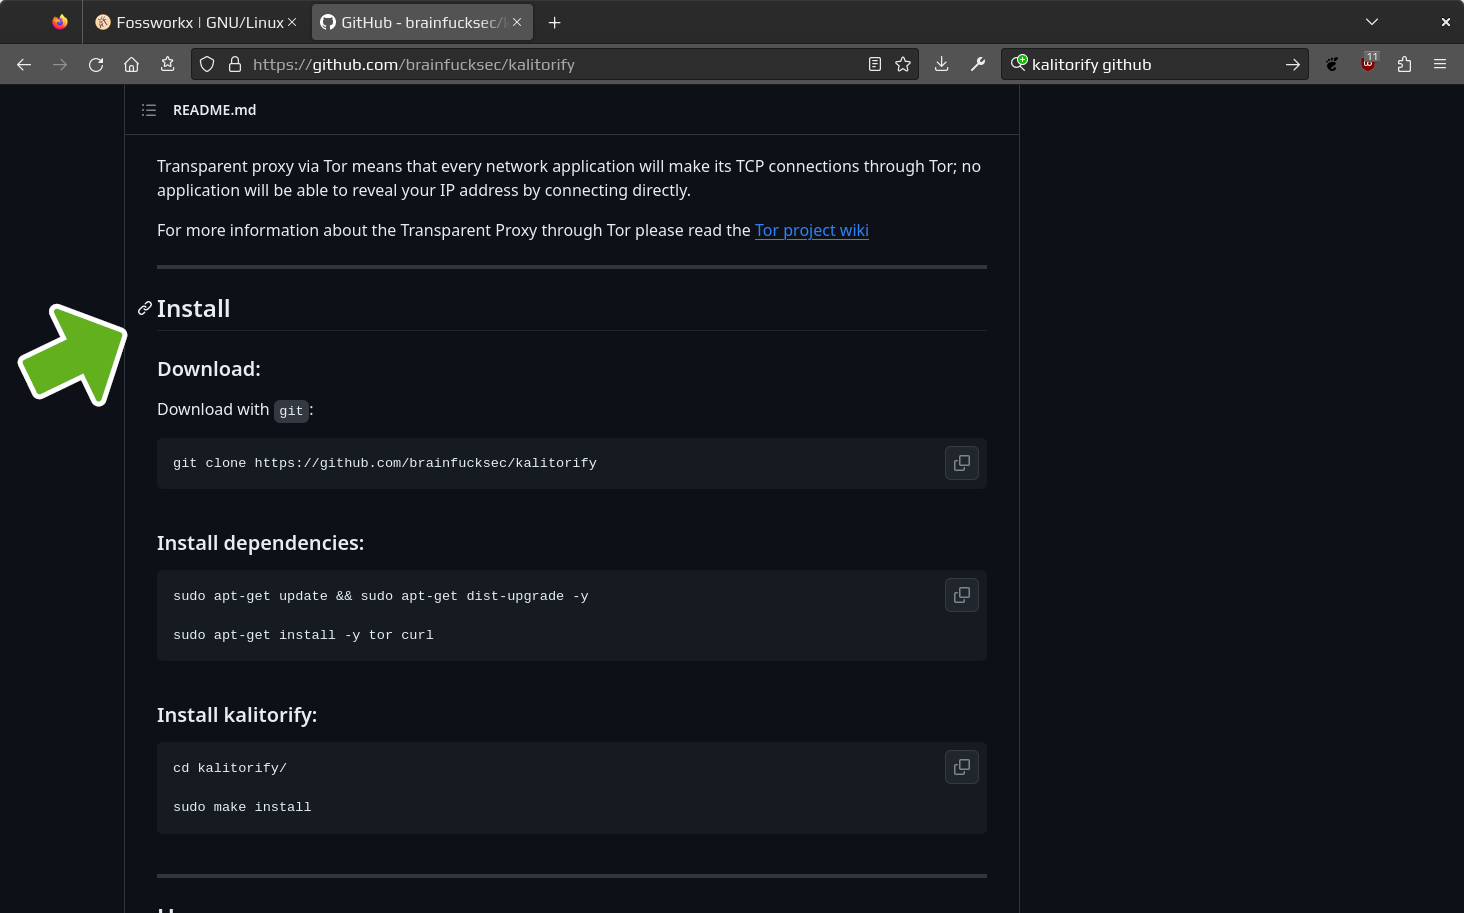
If you were are unable to find the package you were looking for through the repositories, or by downloading it from the official website through the browser, Github is yet another option. Follow the steps below to download and install these packages to your system.
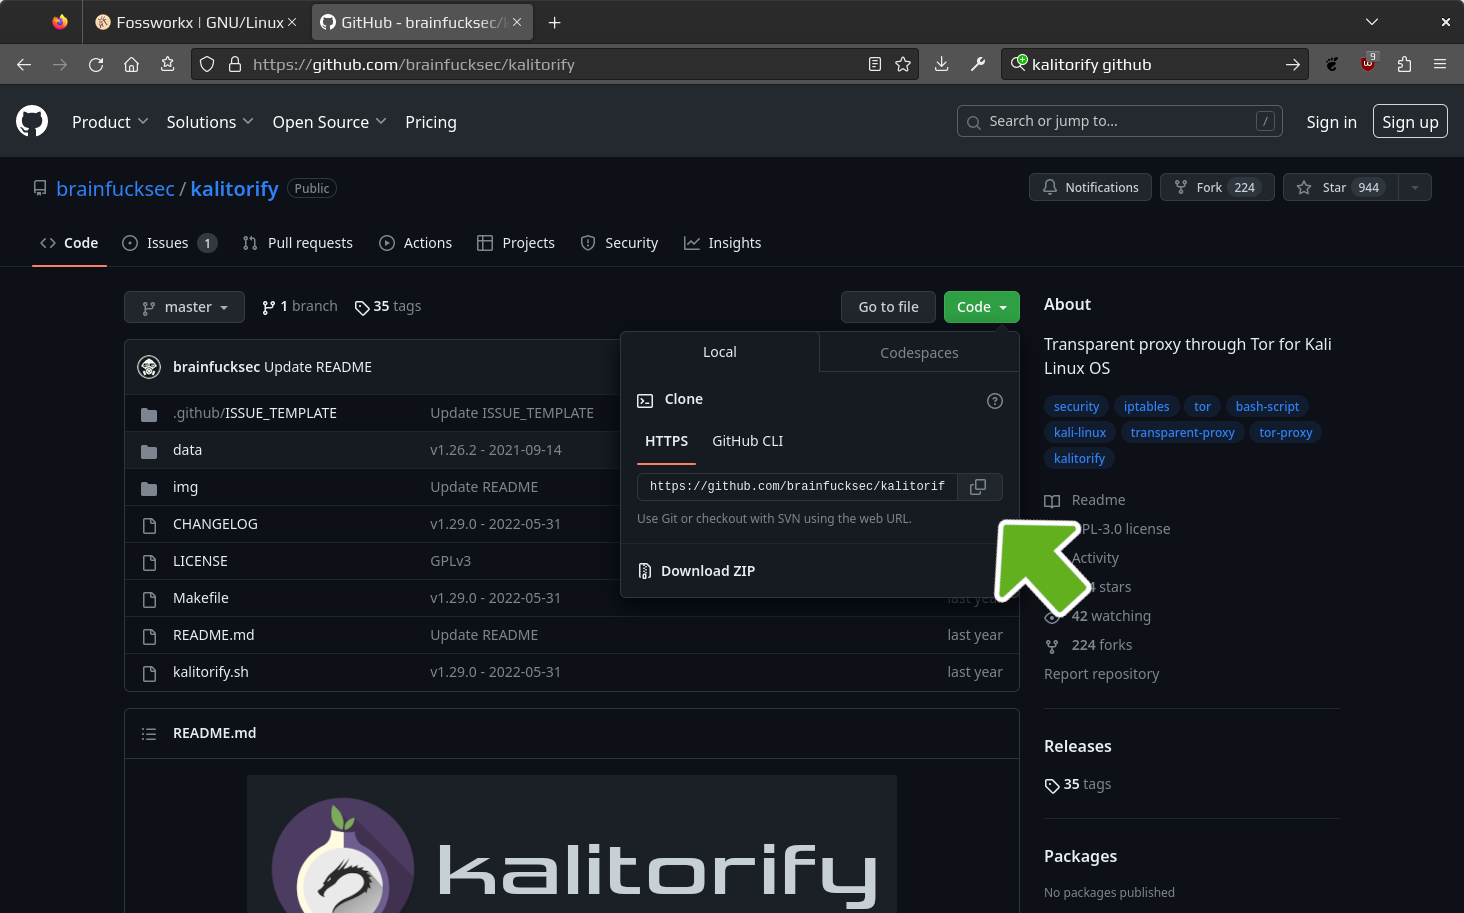
In this example the kalitorify package will be installed
03
Install Git
open up a terminal and install git if not already on the system with the following commands
Install Git
After installing git, you will then be able to clone repositories from the Github website
fossworkx@linux-server:~$ sudo apt install git
04
Clone Repository
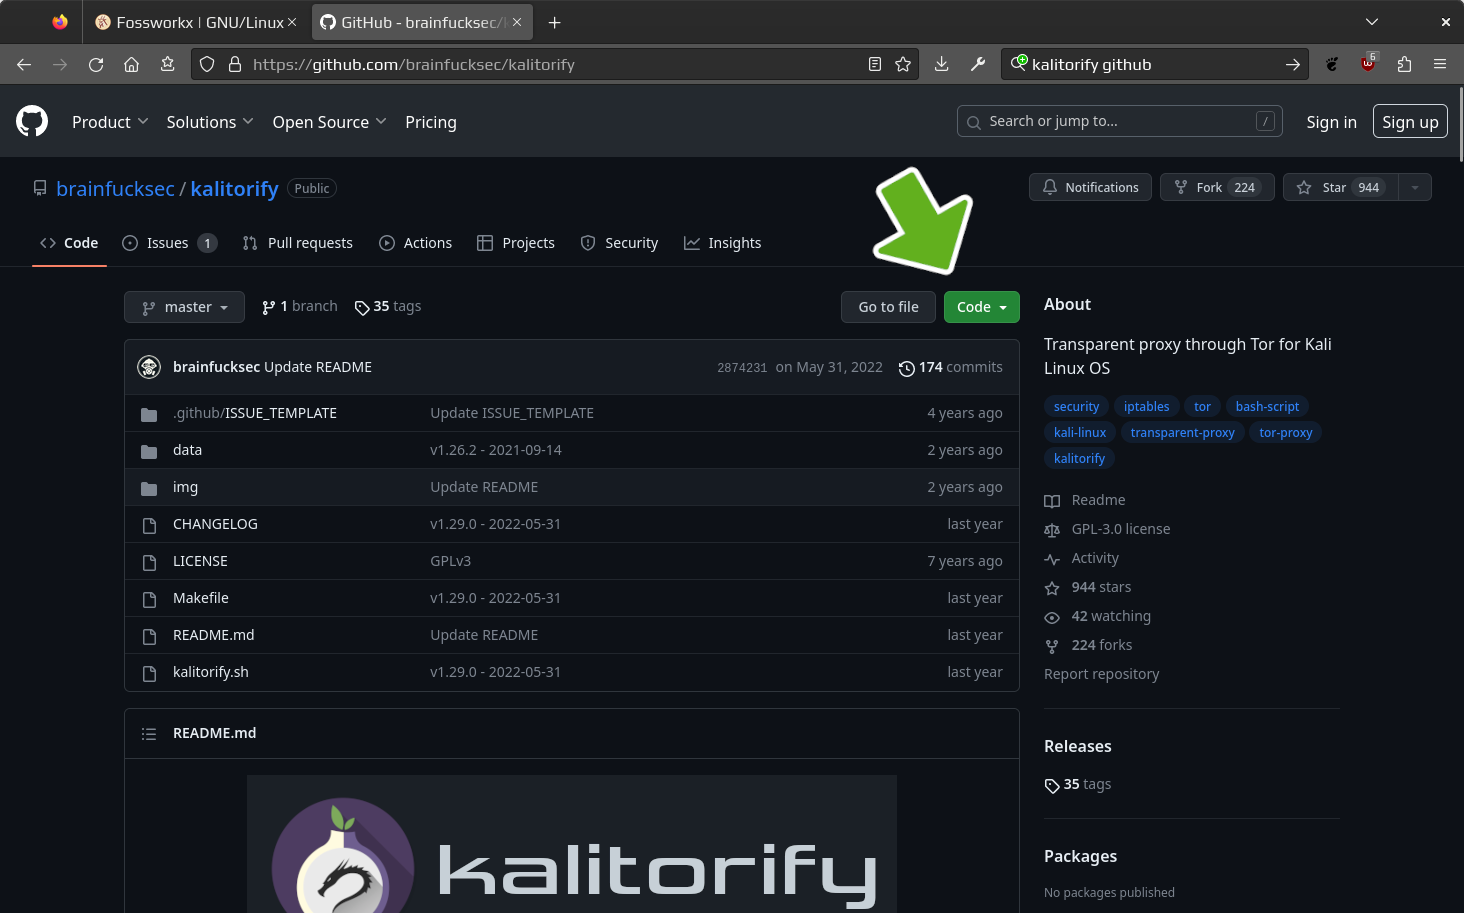
Clone the repository. This will download the contents of the link copied from the github website to the system. In this example kalitorify will be used. Type git clone followed by a space, then paste in the link that was just copied from the Github website.
Clone the repository
After executing the following command, the clone will be located in the current working directory
Methods for installing these cloned repositories can differ from application to application. It is best to refer to the included documentation provided on the github page directly from the developer of the application, to install the package the way it was intended.
You can also look for a README file within the downloaded clone directory.
DIRECTORIES & FILES

Adding directories and files to the system is as easy as copy and paste. Just open up a file manager then copy and paste the required files from your backup drive to the new system. If you would like to copy the entire contents of a backup drive to your home directory in a single command, you can do so using the terminal.
01
Adding Directories & Files
Adding files and directories to the system can be done through a file mananger or by commands through the terminal. Using a file manager, this process can be done by adding the backup drive to the system and using copy and paste. If you would like to use the terminal, the following commands can be used.
Copy directories using a terminal command
The following command can be used to copy the entire contents of a backup drive called BACKUP to the new home directory. This method can be very useful in a post-install script that can be used to automate the process of configuring the system after it has been installed. Instructions for doing this are included in following steps, located in the AUTOMATION section near the bottom of this page.
Confirm the copied directories
Use the following command to show the conents of the Home directory
CLEAN & REBOOT

After upgrading the system and installing the required software, there may be unused packages and old kernels still on the system. In their present state they are most likely harmless, but can build up over time. Cleaning up these files can be done with a single command in the terminal.
01
Cleanup
To remove old unused packages and left over kernels, use the following command. Use caution when executing the command below as it will remove unused kernels from the system eliminating the ability to revert back to them, if the current one is broken. After using this command you will be shown a list of packages that will be removed. Make sure to review this list before allowing it to continue. This system will prompt you to do so.
Clean up the system
Read over which packages will be removed when prompted and select 'No' if anything is listed you don't wish to remove from the system.
02
Reboot
After the system has been configured, it is typically good practice to reboot. Doing this will reload the kernel and apply any changes that may have occured during the customization.
Reboot the system
The system can be rebooted through the GUI interface or through the terminal. The following command will reboot the system using the terminal
SNAPSHOTS

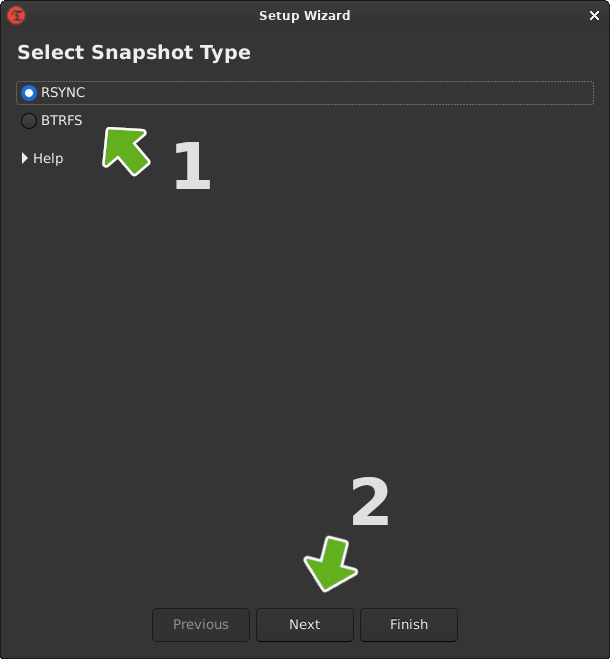
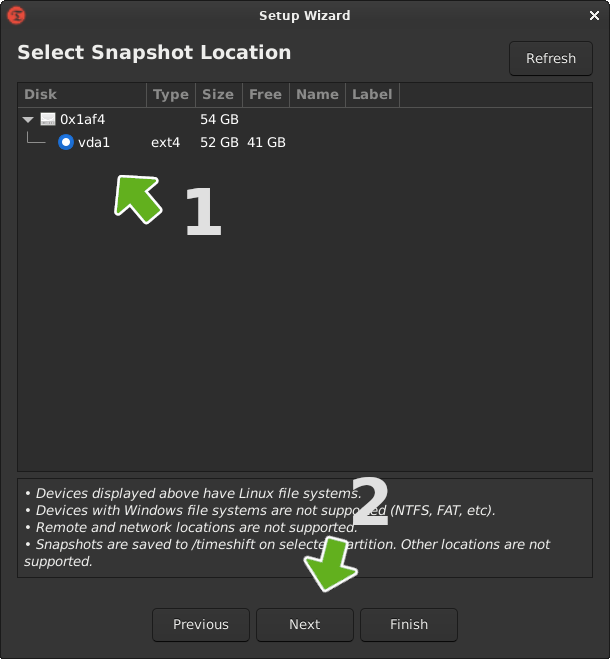
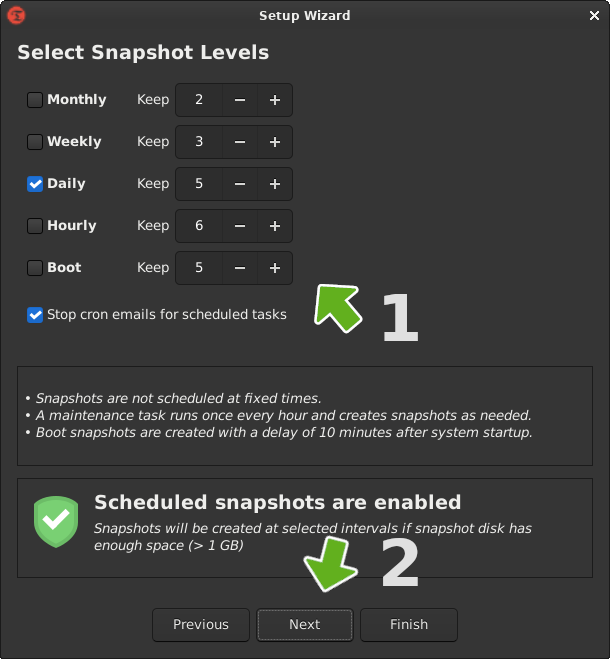
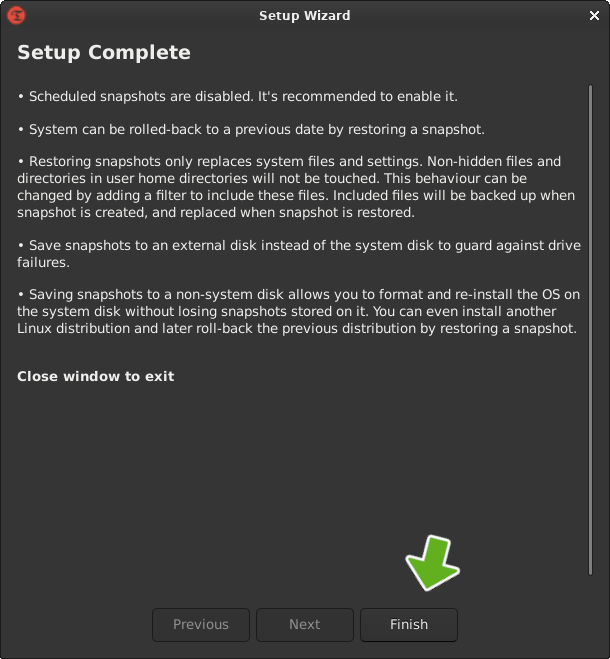
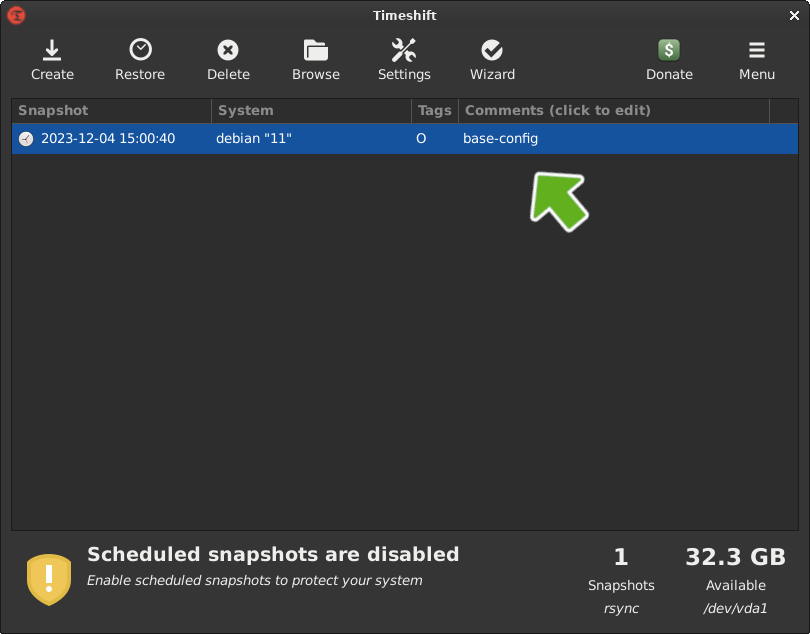
Now that the system is configured and all packages have been installed, taking a snapshot of the system would ensure you can easily return the system to it's present state if disaster may happen to strike in the future. To accomplish this, a tool called Timeshift can be used. In most cases will be installed on the system by default, but if you were unable to find it, the following commands can be use to install it.
01
Install & Launch Timeshift
Timeshift can be installed throught the GUI interface or through the terminal using the following commands
Install Timeshift
fossworkx@linux-server:~$ sudo apt install Timeshift
To open Timeshift... hit your super key and search for Timeshift. Then click on the icon
05
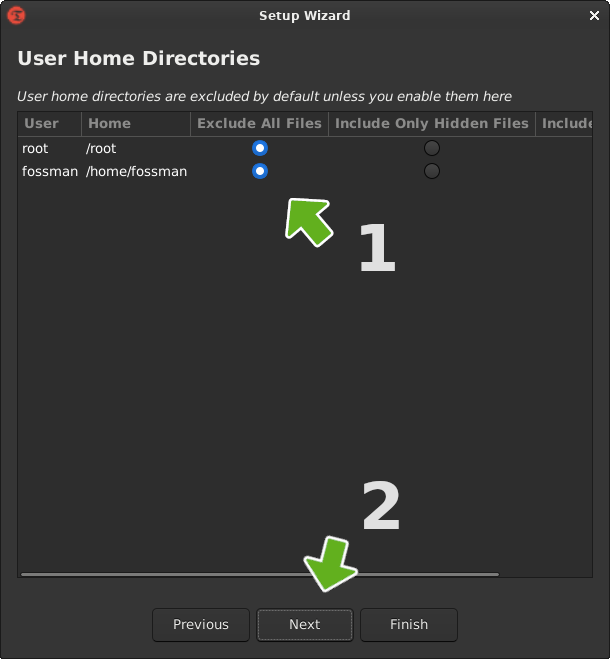
Choose What To Include
By default, your root and home directories will be excluded. This will ensure only the resources required to get the system up and running will be included in the snapshot. This is a great option if you normally back up your files to a separate drive as they do not need to be included in the snapshot. But if you would like to include them, select the include option. Then click [Next]
07
Take A Snapshot
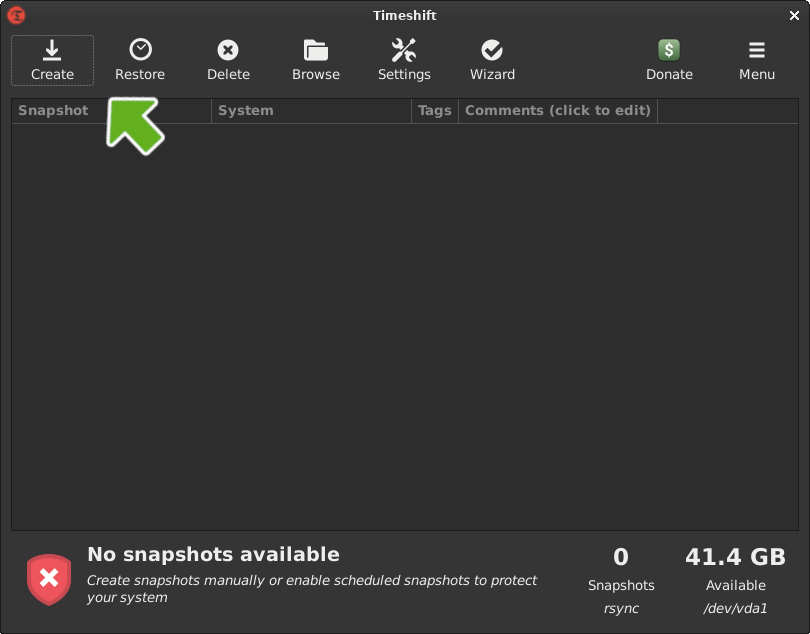
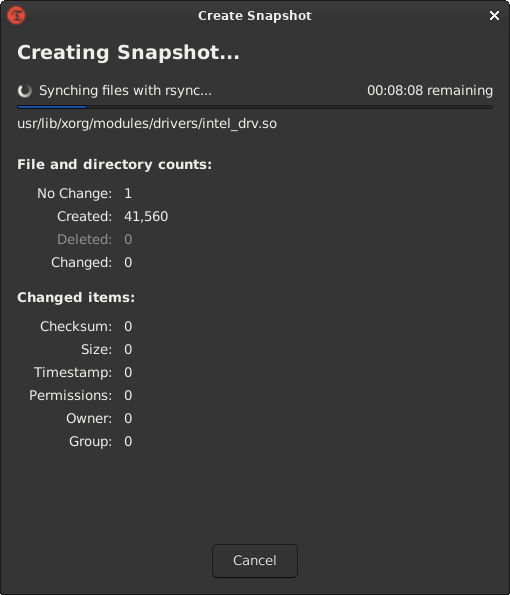
Now with all of the heavy lifting out of the way, all that needs to be done, is to click on [Create]. The snapshot will take from 5 to 10 minutes depending on the system and take up at least 10GB of disk space. The following snapshots will be much smaller in size and complete much faster, as it will only have to add what has been changed since the previous snapshot.
AUTOMATION

If you are beginning to wonder if there is a way to automate this entire process, there certainly is. All you will need to do, is create a post-install script by creating a file with a .sh extension, add the necessary commands and save the file.
Creating this script will also provide peace of mind as you will easily be able to recover your system to it's present state from the ground up. This will also enable you to easily configure multiple systems the exact same way, every time.
01
Create Script Files
The following files will need to be created. In this example... the files will be created and run from a USB drive called POST-INSTL
post-install.sh: main script
bloat.list: list of packages to be removed
apt.list: list of packages to be added
bashrc_extras.txt: content to appended to the .bashrc file
Create directories and files
fossworkx@linux-server:~$ touch post-install.sh bloat.list apt.list bashrc_extras.txt
02
Make A Task List
Create a list of task to be automated by the script.
- Get path of backup drive
- Backup important system files
- Remove system bloat
- Add home directories and dot-files
- Install repository packages
- Install local packages (.deb's)
- Configure .bashrc
- Configure installed packages
- Clean up the system
03
Translate Tasks Into Commands
The following list of commands are common to all GNU/Linux based operating systems. If your distribution is Debian based, the commands can be used exactly as they are. If it's not, you will need to substitute 'apt' for your package manager.
# get the backup path
echo "Enter the backup path below [/media/$USER/BACKUP/home/]"
read BACKUP
# backup .bashrc, .profile and sources.list
sudo cp ~/.bashrc ~/.bashrc.bak
sudo cp ~/.profile ~/.profile.bak
sudo cp /etc/apt/sources.list /etc/apt/sources.list.bak
# remove system bloat
sudo apt purge -y $(cat /media/$USER/POST-INSTL/lists/bloat.list)
# add home directories and dot files
cp -r /media/$USER/BACKUP/. /home/$USER/
# install repository packages
sudo apt update
sudo apt install -y $(cat /media/$USER/POST-INSTL/lists/apt.list)
# install local packages
sudo dpkg -i ~/.packages/*.deb
sudo apt install -f
# configure '.bashrc'
# append contents of '.bashrc_extras'
cat /media/$USER/POST-INSTL/docs/system/bashrc_extras.txt >> ~/.bashrc
# configure installed packages
ls /media/$USER/POST-INSTL/docs/packages/
# cleanup the system
sudo apt autoremove
04
Write The Script
This script includes all of the commands listed above with inputs for the user so they can provide a path to their backup drive and an option to continue after each step. Which will allow them to confirm each step was completed successfully before continuing with the next.
#!/usr/bin/bash

# welcome
echo ""
echo "welcome to post-install.sh"
echo ""
sleep 2

# 0. get the backup path
echo "Enter the backup path below [/media/$USER/BACKUP/home/]"
read BACKUP
sleep 2
echo ""
echo "backup path provided: $BACKUP"
sleep 1
read -p "<enter> to continue"
clear
echo ""

# 1. backup '.bashrc', .'profile', 'sources.list'
echo "backing up important dot-files..."
sleep 2
sudo cp ~/.bashrc ~/.bashrc.bak
sudo cp ~/.profile ~/.profile.bak
sudo cp /etc/apt/sources.list /etc/apt/sources.list.bak
echo ""
echo "done."
read -p "<enter> to continue"
clear
echo ""

# 2. remove system bloat
echo "removing system bloat..."
sleep 2
sudo apt purge -y $(cat /media/$USER/POST-INSTL/lists/bloat.list)
echo ""
echo "done."
read -p "<enter> to continue"
clear
echo ""

# 3. add home directories and dot files
echo "adding home directories..."
sleep 2
cp -r /media/$USER/BACKUP/. /home/$USER/
echo ""
echo "done."
read -p "<enter> to continue"
clear
echo ""

# 4. install repository packages
echo "adding repository packages..."
sleep 2
sudo apt update
sudo apt install -y $(cat /media/$USER/POST-INSTL/lists/apt.list)
echo ""
echo "done."
read -p "<enter> to continue"
clear
echo ""

# 5. install local packages
echo "adding local packages..."
sleep 2
sudo dpkg -i ~/.packages/*.deb
sleep 2
echo ""
echo "adding missing dependencies"
echo ""
sudo apt install -f
echo ""
echo "done."
read -p "<enter> to continue"
clear
echo ""

# 6. configure '.bashrc'
echo "adding .bashrc configurations"
sleep 2
cat /media/$USER/POST-INSTL/docs/system/bashrc_extras.txt >> ~/.bashrc
echo ""
echo "done."
read -p "<enter> to continue"
clear
echo ""

# 7. configure installed packages
echo "configure installed packages..."
sleep 2
ls /media/$USER/POST-INSTL/docs/packages/
echo ""
echo "refer to documentation provided above"
read -p "<enter> to continue"
clear
echo ""

# 8. cleanup the system
echo "cleaning up the system..."
sleep 2
sudo apt autoremove
echo ""
echo "done."
read -p "<enter> to continue"
clear
echo ""

# exit
echo "system configuration complete!"
echo ""
read -p "<enter> to exit"
sleep 2
echo "goodbye"
sleep 2
exit
05
Instructional Video
Click on the video below if you would like to see a tutorial of this process from start to finish.


