PASSWORD MANAGEMENT

Password management made easy.
PASSWORD MANAGER

The Following scripts can be created to easily manage all of your passwords. passman.py will be used to organize and display the login information. passman.sh will be used to decrypt and launch the python script, permanently delete and over-write the decrypted version after the login information has been displayed on the screen and lastely clear the clipboard when the script exits. AES-256 encryption will be used to encrypt passman.py holding the passwords and login information.
01
Preparation
Before the following scripts can be executed on the system, the gnupg package will need to be installed if it is not on the system by default. This is the GNU Privacy Guard which will be used to encrypt and decrypt the files.
Install dependencies (gnupg and xsel)
The following example will be using the apt package manager. If you are not using a Debian base distribution, substitute apt for your package manager of choice. gnupg will be used encrypt and decrypt the password manager and xsel will also be used to clear the clipboard when the script exits. However... if you are using Wayland and not X11, substitute xsel with wl-clipboard
Create scripts and make executable
Use the following commands to create the scripts and make them executable by you only.
| SCRIPT | PURPOSE |
|---|---|
| passman.py.gpg |
- show available accounts - prompt user for required accounts - provide account usernames & passwords |
| passman.sh |
- decrypt passman.py.gpg - launch passman.py - delete and overwrite decrypted copy - clear the clipboard post execution |
02
passman.py
This script will be used to show available accounts, prompt the user to provide the accounts they require login information for and return the login information for those accounts.
Open and edit passman.py
Using your text editor of choice, open passman.py, then copy and paste the following code snippet into the document. After doing so, substitute your own login information, then save the file and exit.
#!/usr/bin/python3
# -*- coding: utf-8 -*-
from __future__ import unicode_literals
import time
import sys

'''
add new account:
1. add the name to the list below
   - all enteries must be in Title Case
   - number of list items must be an equal number
     if not, add an empty string to the end of the list eg. ''
2. add account instance
'''

# account list:
accounts = ['Account 01', 'Account 02', 'Account 03', 'Account 04', 'Account 05',
            'Account 06', 'Account 07', 'Account 08', 'Account 09', 'Account 10']

# sort above list
accounts = sorted(accounts)

# empty lists
account_list = []

# print title
print('\n ----------------------')
print('| Avalible Accounts: ' + str(len(accounts)) + ' |')
print(' ----------------------\n')

# print accounts
for a, b in zip(accounts[::2], accounts[1::2]):
    print(' {:<35} {:<}'.format(a, b))

class Account:
    def __init__(self, name, url, username, password):
        self.name = name
        self.url = url
        self.username = username
        self.password = password

    def account_info(self):
        print('\n\n ' + self.name)
        print(' URL:\t\t ' + self.url)
        print(' Username:\t ' + self.username)
        print(' Password:\t ' + self.password)

'''
Instances: - Name
           - URL
           - Username
           - Password
'''

Account01 = Account('Account 01 Name\n ---------------',
                    'https://account01_url_here',
                    'account01_username_here',
                    'account01_password_here')

Account02 = Account('Account 02 Name\n ---------------',
                    'https://account02_url_here',
                    'account02_username_here',
                    'account02_password_here')

Account03 = Account('Account 03 Name\n ---------------',
                    'https://account03_url_here',
                    'account03_username_here',
                    'account03_password_here')

Account04 = Account('Account 04 Name\n ---------------',
                    'https://account04_url_here',
                    'account04_username_here',
                    'account04_password_here')

Account05 = Account('Account 05 Name\n ---------------',
                    'https://account05_url_here',
                    'account05_username_here',
                    'account05_password_here')

Account06 = Account('Account 06 Name\n ---------------',
                    'https://account06_url_here',
                    'account06_username_here',
                    'account06_password_here')

Account07 = Account('Account 07 Name\n ---------------',
                    'https://account07_url_here',
                    'account07_username_here',
                    'account07_password_here')

Account08 = Account('Account 08 Name\n ---------------',
                    'https://account08_url_here',
                    'account08_username_here',
                    'account08_password_here')

Account09 = Account('Account 09 Name\n ---------------',
                    'https://account09_url_here',
                    'account09_username_here',
                    'account09_password_here')

Account10 = Account('Account 10 Name\n ---------------',
                    'https://account10_url_here',
                    'account10_username_here',
                    'account10_password_here')

# make list
def make_list():
    account = 'empty'
    print('')
    while account != 'Done':
        account = input(' Enter Account => ')
        account = account.title()
        if account != 'Done' and account not in accounts:
            print(' [x] Account not found\n [?] Please try again\n')
        else:
            account_list.append(account)
    account_list.remove('Done')
    print('\n Selected Accounts\n =================')
    for item in account_list:
        print(' ' + item)
    time.sleep(1)
    cont = input('\n Press [ENTER] to continue')
    time.sleep(1)
    print(' populating list...')
    time.sleep(2)

# main function
def main():
    make_list()
    for item in account_list:
        item = item.replace(' ', '')
        item = eval(item)
        item.account_info()

'''
==============
Main Execution
==============
'''
if __name__ == '__main__':
    main()

# Exit Program
time.sleep(1)
sys.exit()
Encypt passman.py
Use the following command to encrypt the file. The new file will be named passman.py.gpg. After doing so... shred the original (passman.py). Using the shred command will not only delete the file, but will also overwrite it with zeros or random data.
03
passman.sh
This script will be used to decrypt passman.py, launch passman.py. Then delete and overwrite the file after the login information has been displayed on the screen
Open and edit passman.sh
Using your text editor of choice, open passman.sh, then copy and paste the following code snippet into the document. After doing so, save the file and exit.
#!/usr/bin/bash

echo ""
echo "Welcome to PASSMAN.SH"
sleep 1
echo "Decrypting the password manager now..."
sleep 1
echo "please enter master password when prompted."
sleep 2
echo ""
gpg --output passman.py -d --no-symkey-cache passman.py.gpg
sleep 1
echo ""
echo "Decryption successfull!"
sleep 1
echo "launching the password manager..."
echo ""
sleep 1
chmod 700 passman.py
sleep 1
./passman.py
echo ""
echo ""
echo " Clean Up"
echo " --------"
echo " Clear the clipboard and delete passman.py?"
read -p " Hit <ENTER> to continue / ctrl + c to cancel"
echo ""
sleep 1
# X11 (clear clipboard)
xsel -cb
# Wayland (clear clipboard)
# wl-copy -c
sleep 1
echo " clipboard cleared"
# X11 (clear primary)
xsel -cp
# Wayland (clear primary)
# wl-copy -cp
sleep 1
echo " primary cleared"
sleep 1
shred -u passman.py
echo " passman.py removed and overwritten (passman.py.gpg preserved)"
sleep 1
echo ""
echo " Closing passman..."
sleep 1
echo " goodbye."
exit
04
Execution
Now that both passman.py and passman.sh have been created and made executable, they can be run. To run the scripts, run passman.sh. After doing so, passman.py will be executed by the passman.sh script. After the script has run, passman.py which contains all of the sensitive data will be automatically deleted and over written with random data preserving the original unencrypted copy. The clipboard will also be cleared when the program exits. Open up a terminal and use the following command to run the scripts.
Run the scripts
To use the scripts, run passman.sh.
Provide password and accounts
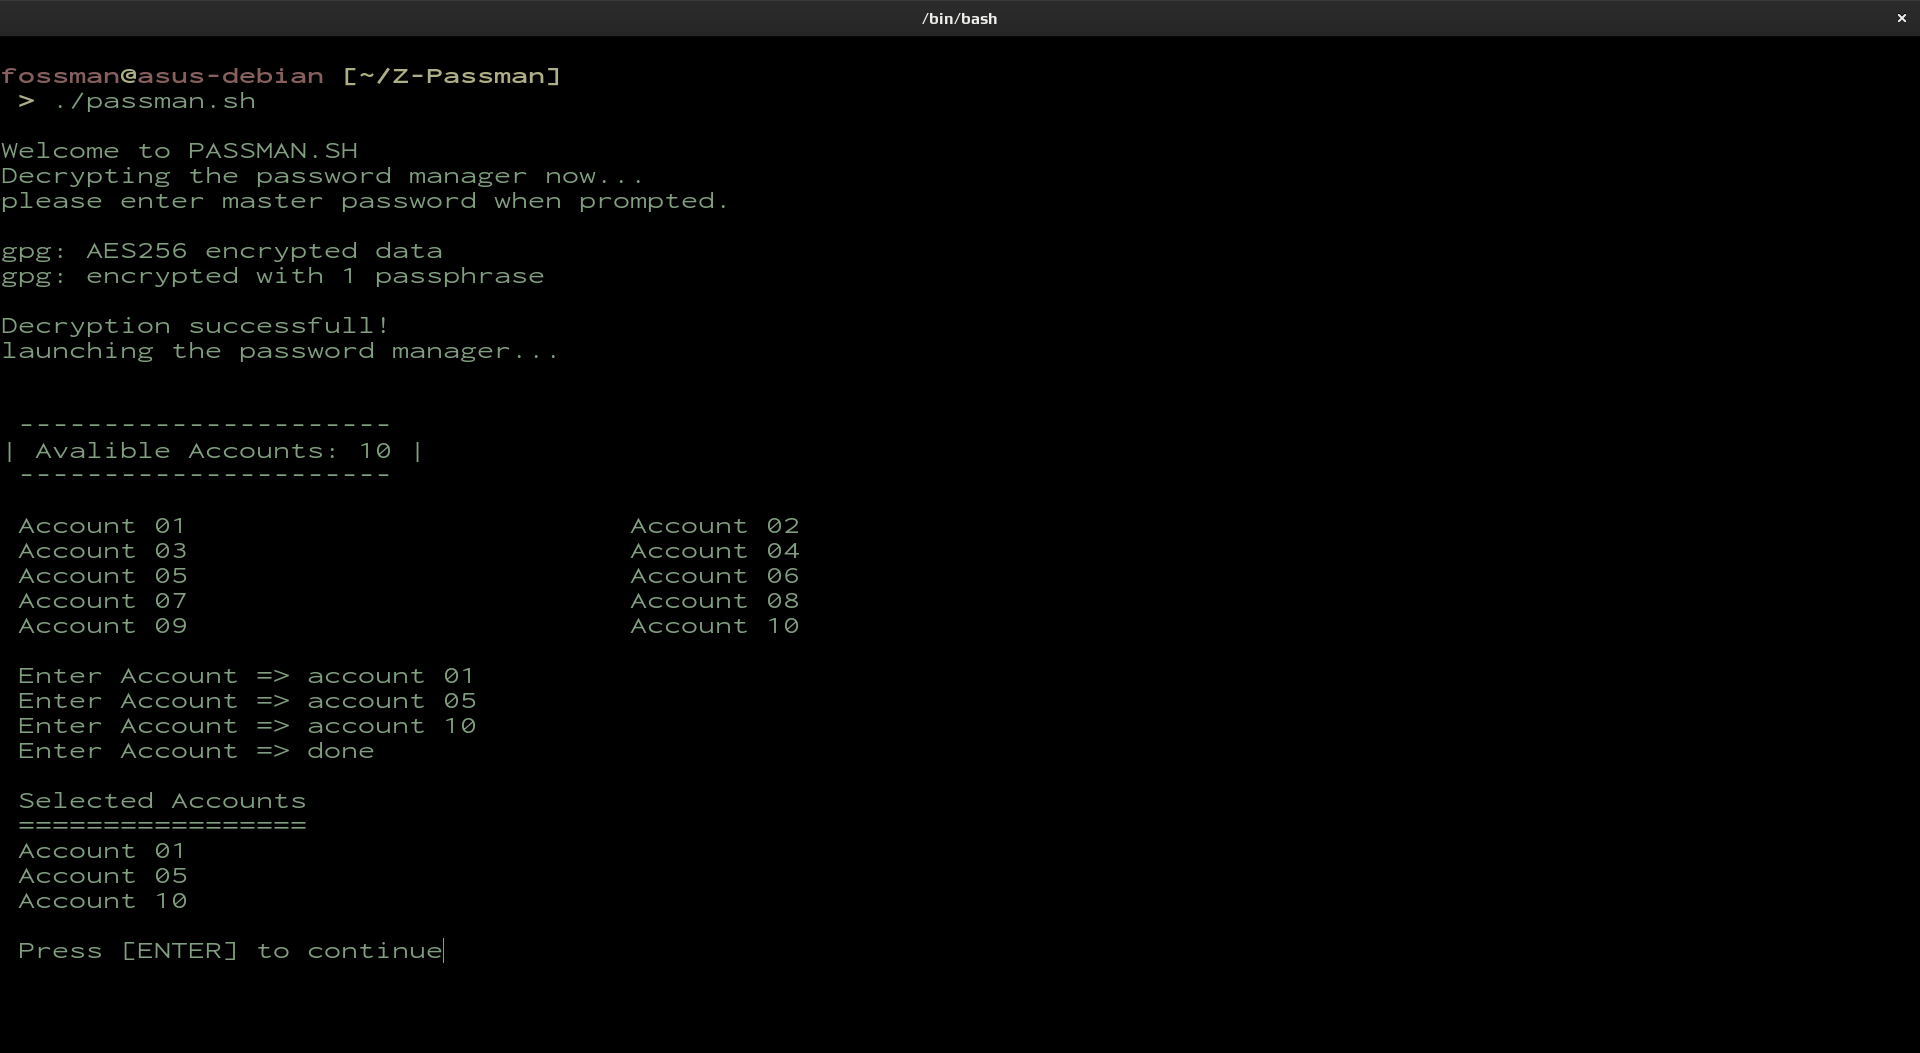
immediately after running the script, the user will be prompted to provide the password that was used to encrypt the file. After doing so, passman.sh will then decrypt the python file (passman.py.gpg) containing the login information, then run it.
Next... you will need to enter in the accounts you require the login information for, followed by the word 'done'. A list of the selected accounts will then be shown. Confirm by hitting [ENTER] or ctrl + c to cancel and quit.

Retrieve login information
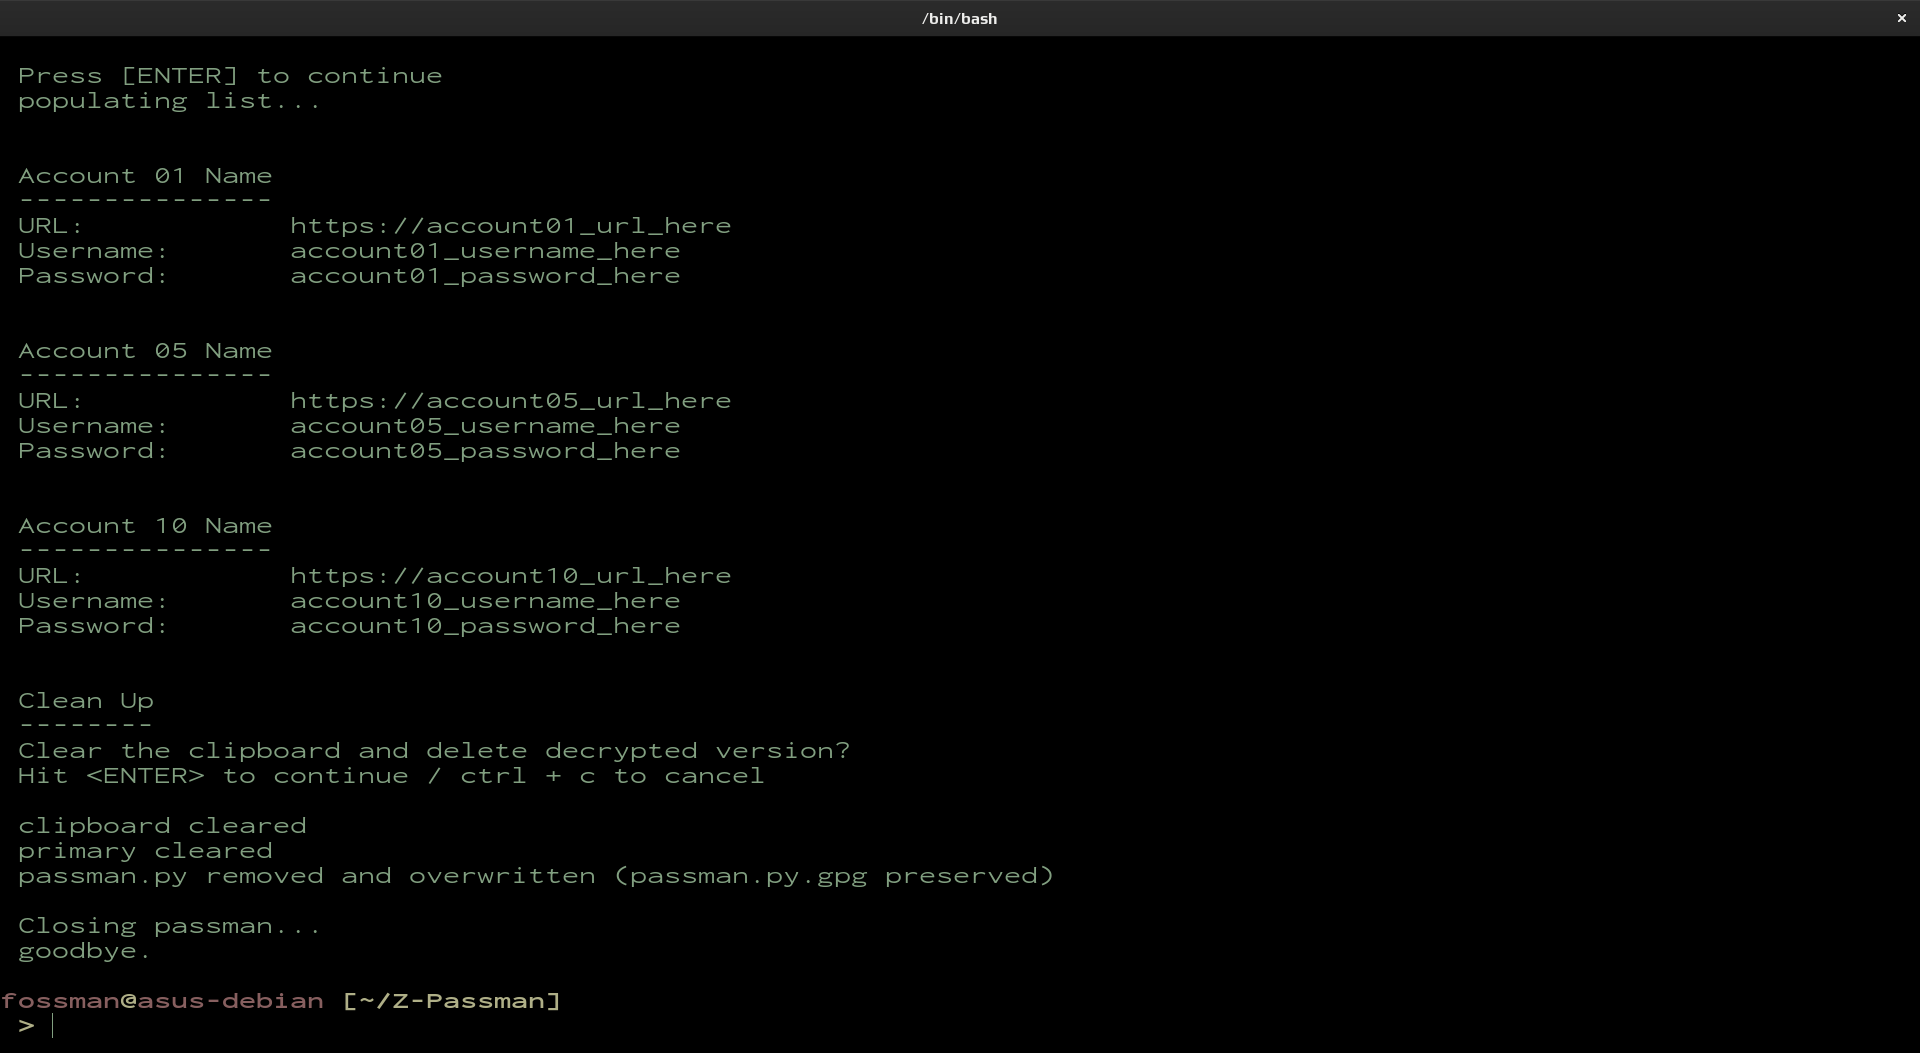
At this point, the login information for the requested accounts should now be shown on the screen. As you can see in the screen-shot below.

Final steps
If you copy and pasted your login information such as passwords from the script's output, you will most likely want to clear the clipboard. If you would like to do this, just hit enter. After doing so, the clipboard will be cleared and the unencrypted version of the script (passman.py) will be deleted from the system and overwritten preserving the encrypted copy (passman.py.gpg).
Automating the process of signing in to these accounts can also be achieved using a Python module called Selenium, but unfortunately this method is often blocked by CAPCHA with the purpose of detouring bots. When we have found a way around this obstacle, the solution will be posted here soon after.

